Yay! You came back. I promise you won’t be disappointed with the outcome of the car seat cover or my binding method. We have a LOT to cover so let’s stop loitering and……
as Charlie says “let’s roll!”
Okie Dokie now, when I left you we had just cut the strips for the binding. I use 2 1/2″ strips for my binding but if you have a width you prefer, please use that.
Grab two of your cut and ironed strips (a bit of starch is good too). Align the edges and place these strips RIGHT sides together at right angles.
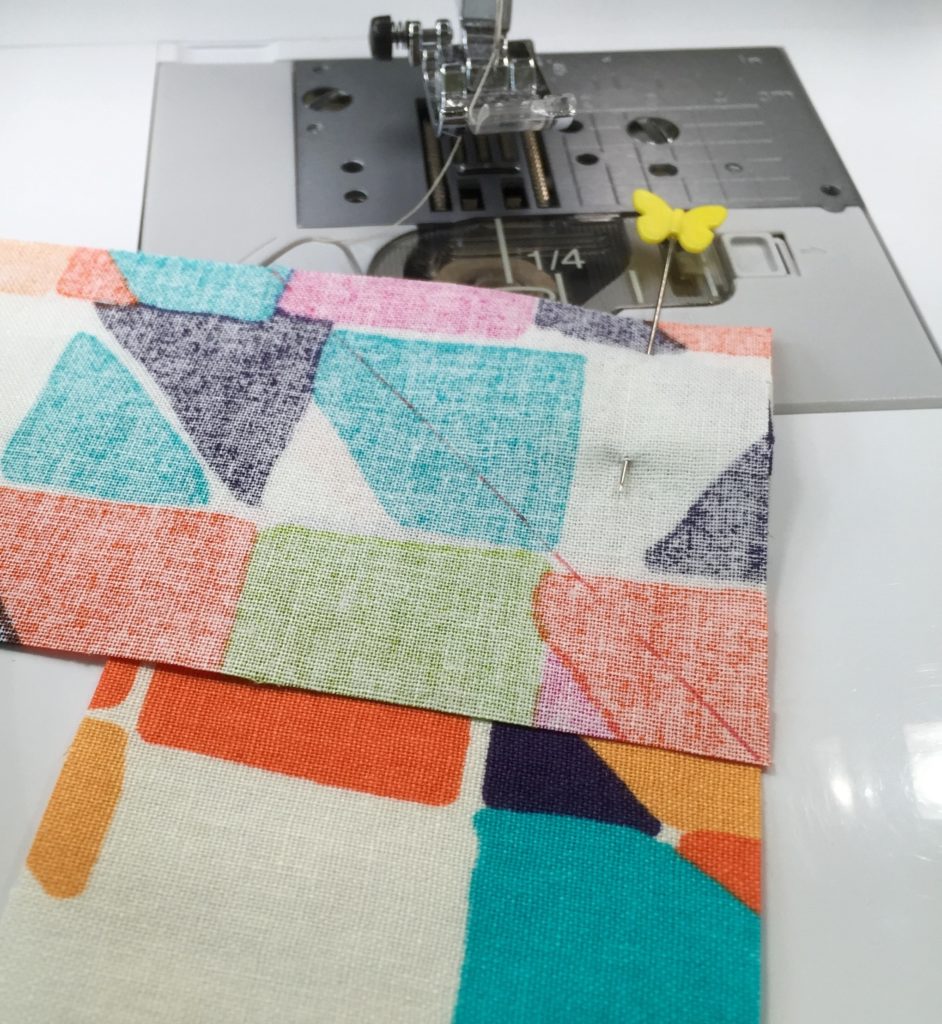
Pin along the corner and mark a 45 degree angle from the top LEFT corner to the bottom RIGHT corner. This will be your sew line.
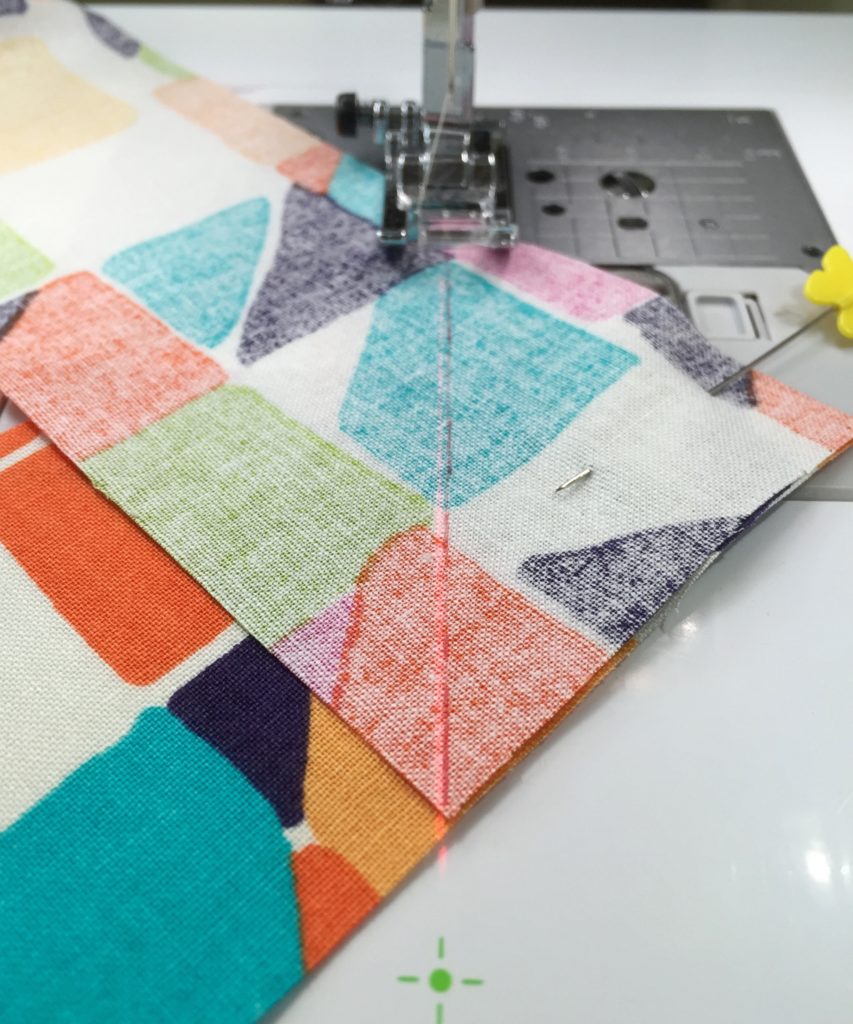
If you have a laser line, use it but if not the drawn line will help your accuracy. Sew these pieces together and remove the pin.
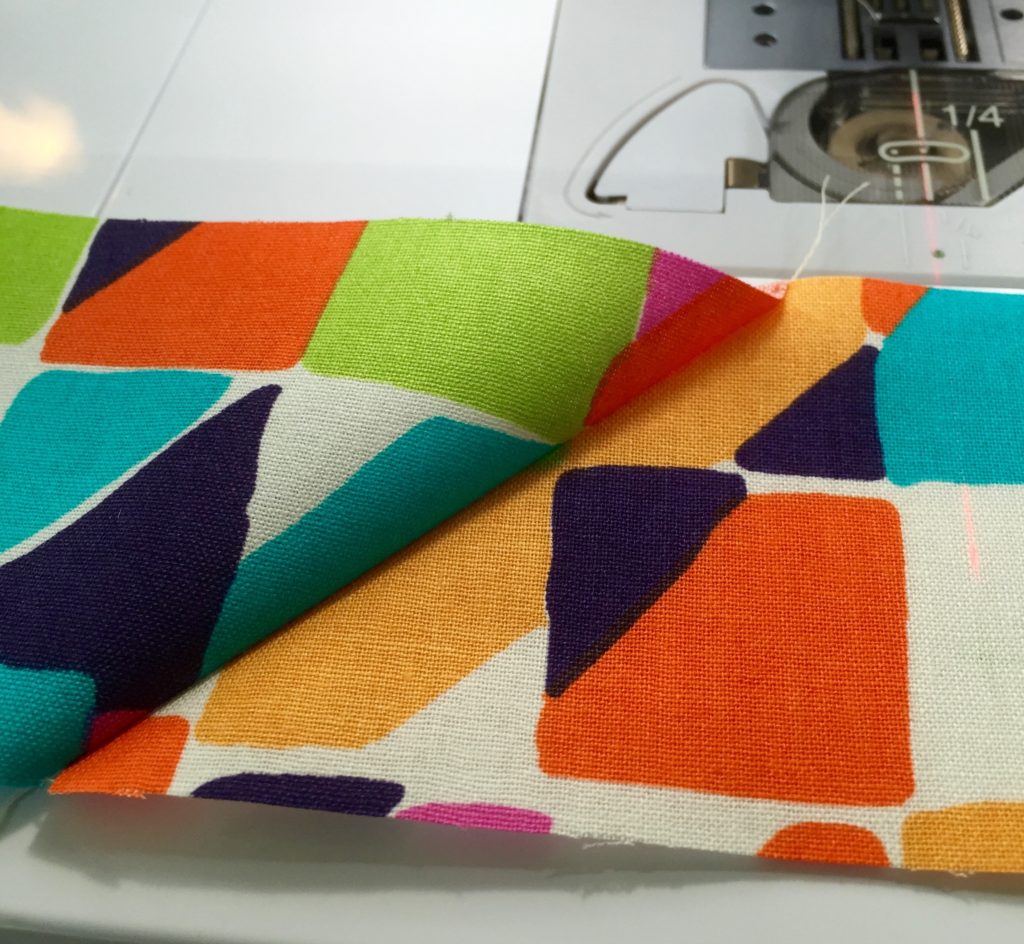
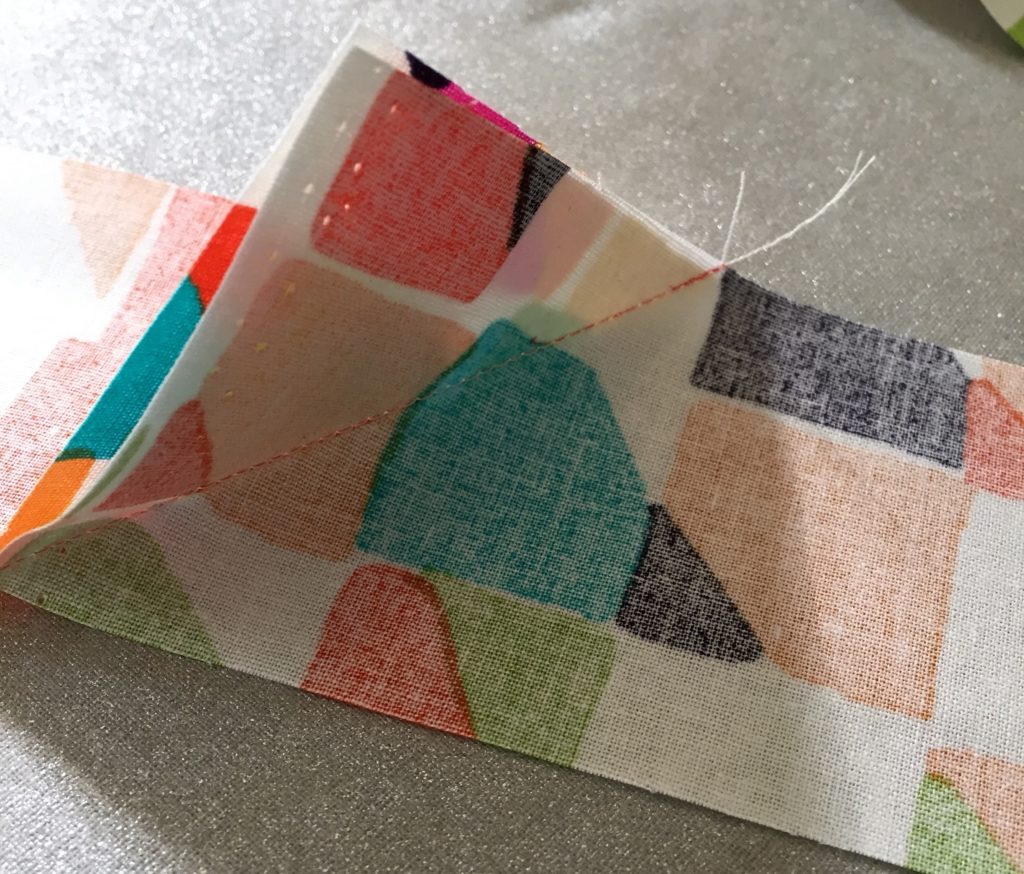
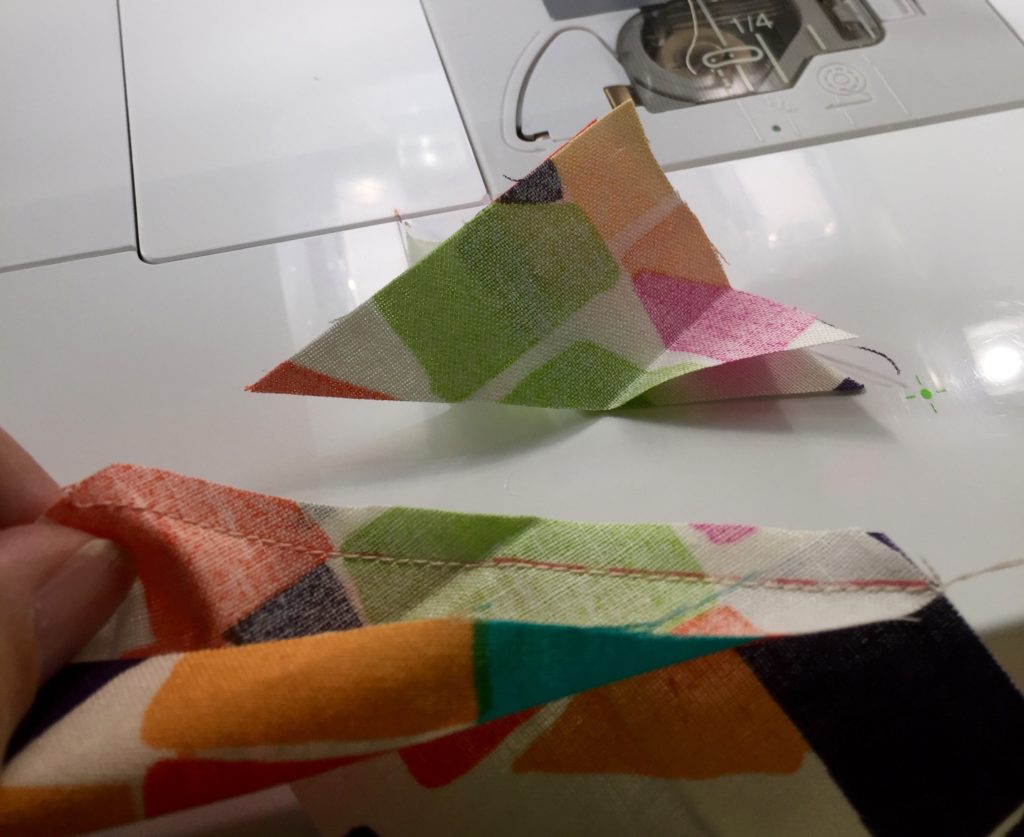
When you open the seam, it should look like this with a nice clean 45 degree joint. Do this for all of the remaining binding strips you cut until you have one long snake of binding fabric.
The back of each join should look like this:
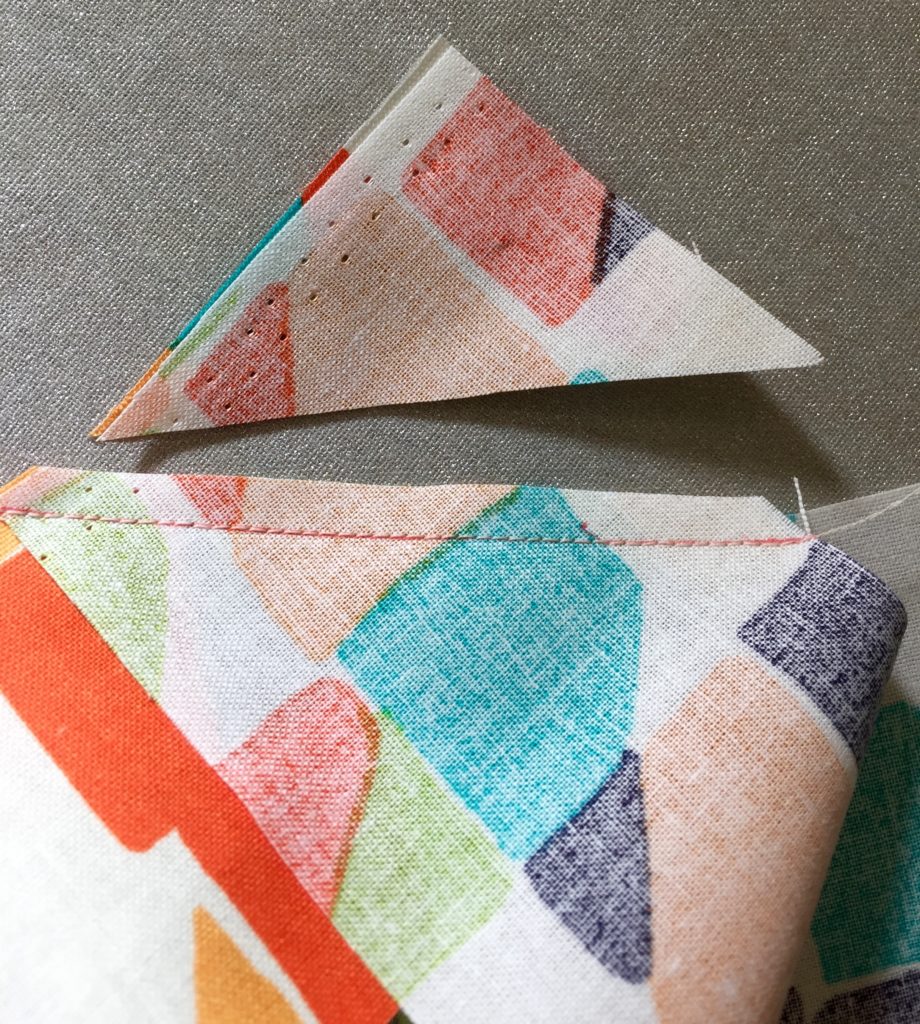
We need to cut the excess away and iron open the seam.
Leave a 1/4″ seam allowance when trimming.
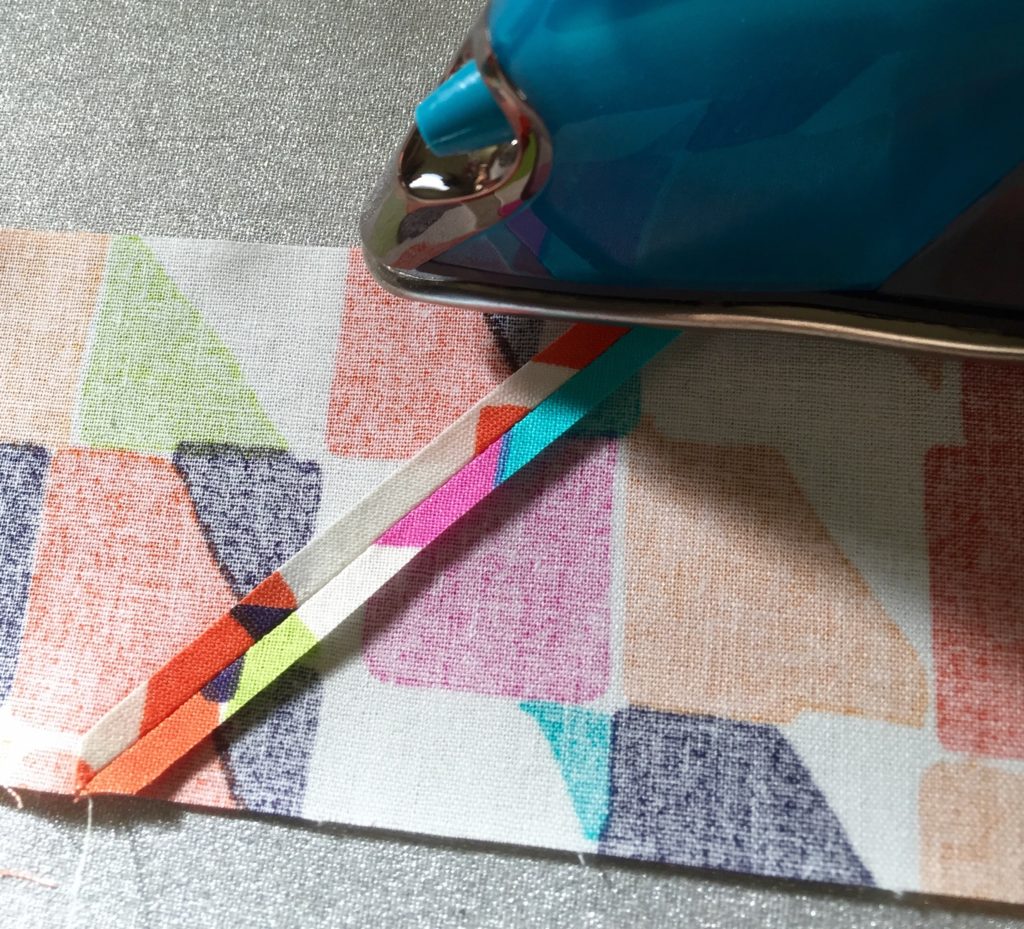
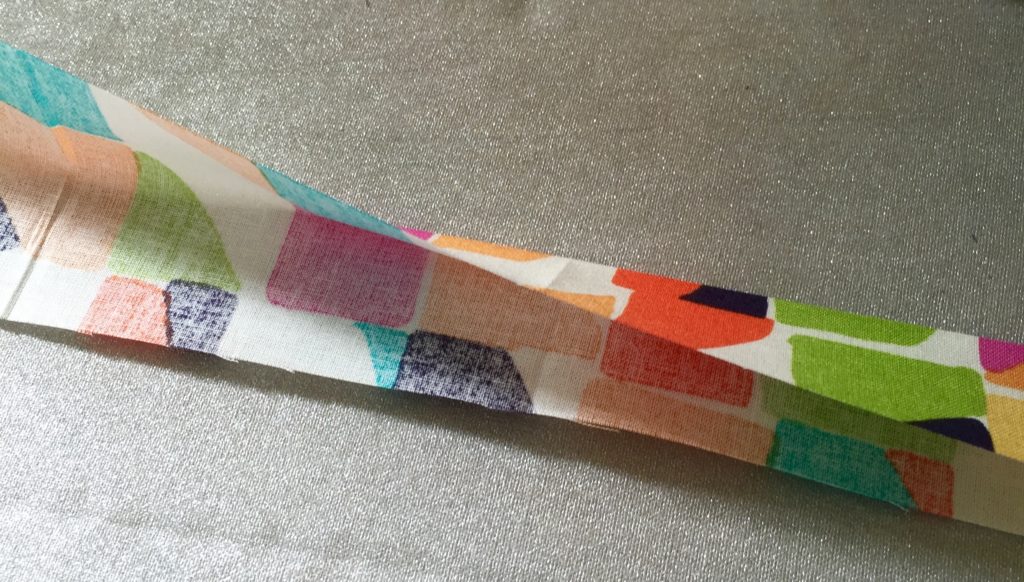
Lovely! Now let’s head to the ironing board and iron open each seam and then press each strip in half with wrong sides together.
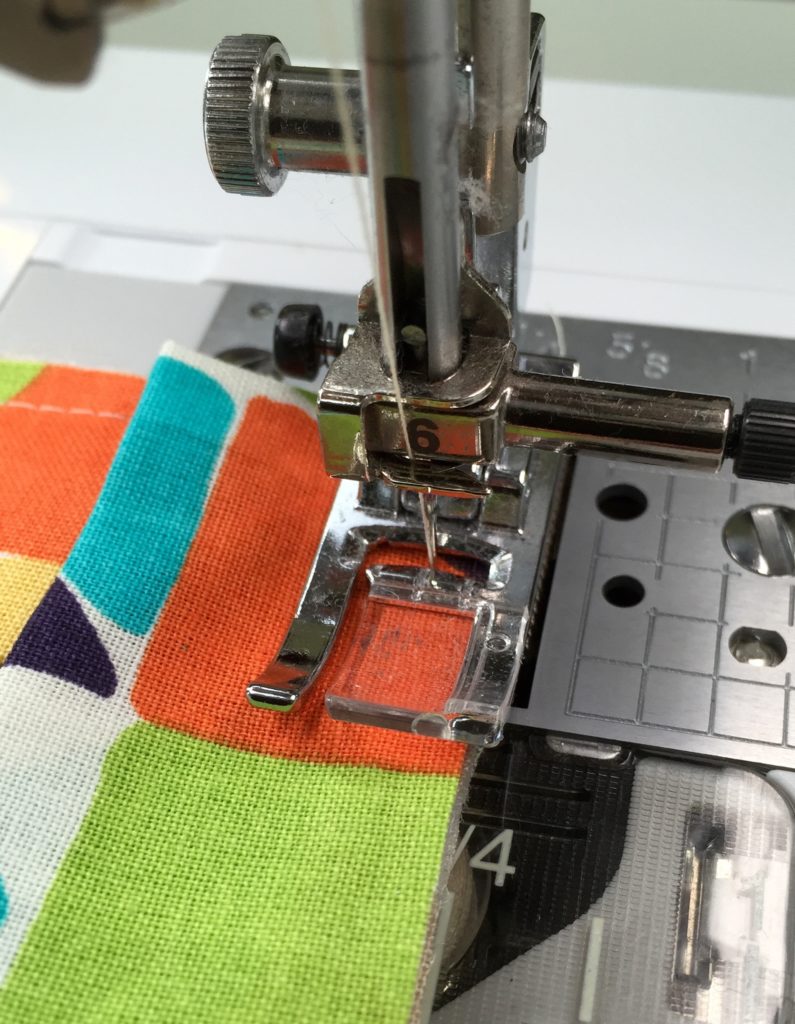
One hint I have for you is that I take my strip of binding and audition it around the edge of my project because I don’t want any of the seams to end up where I am turning a corner or where I will make my final join. Now take binding and cover to the machine and leave at least an 8″ tail and then begin sewing on the BACK side using a 1/4″ seam allowance.
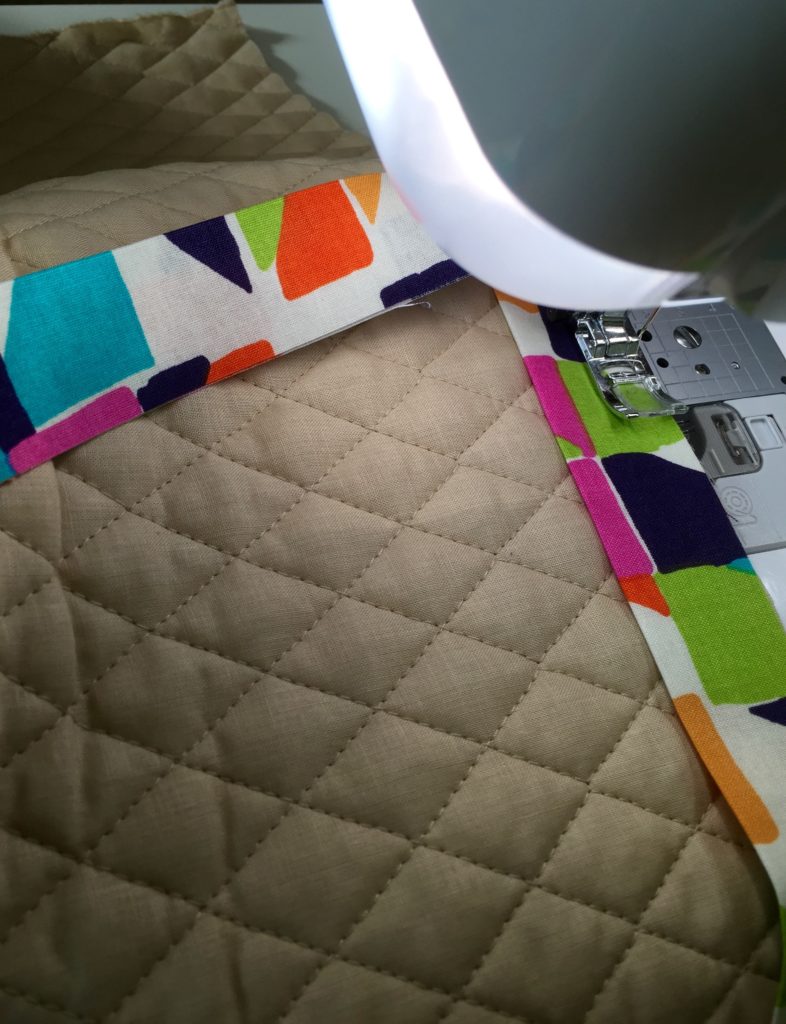
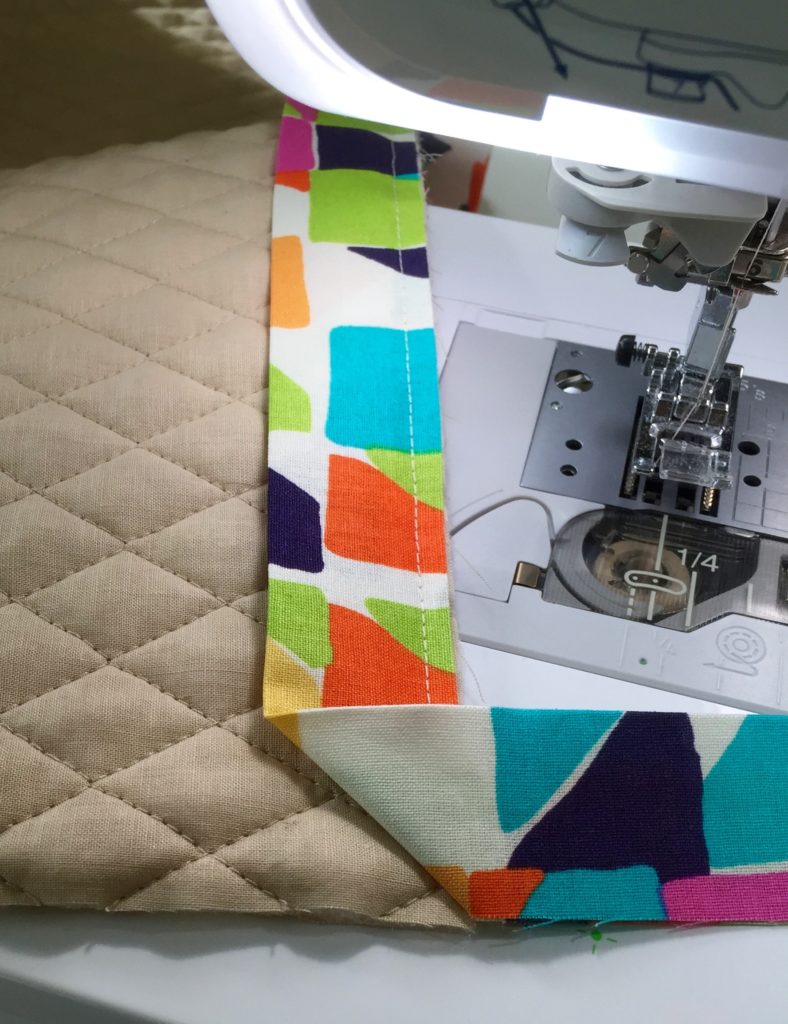
Raw edges are aligned, an ample tail is left and I am sewing the binding strip to the back of the car cover. Sew within 1/4″ of the corner of your project.
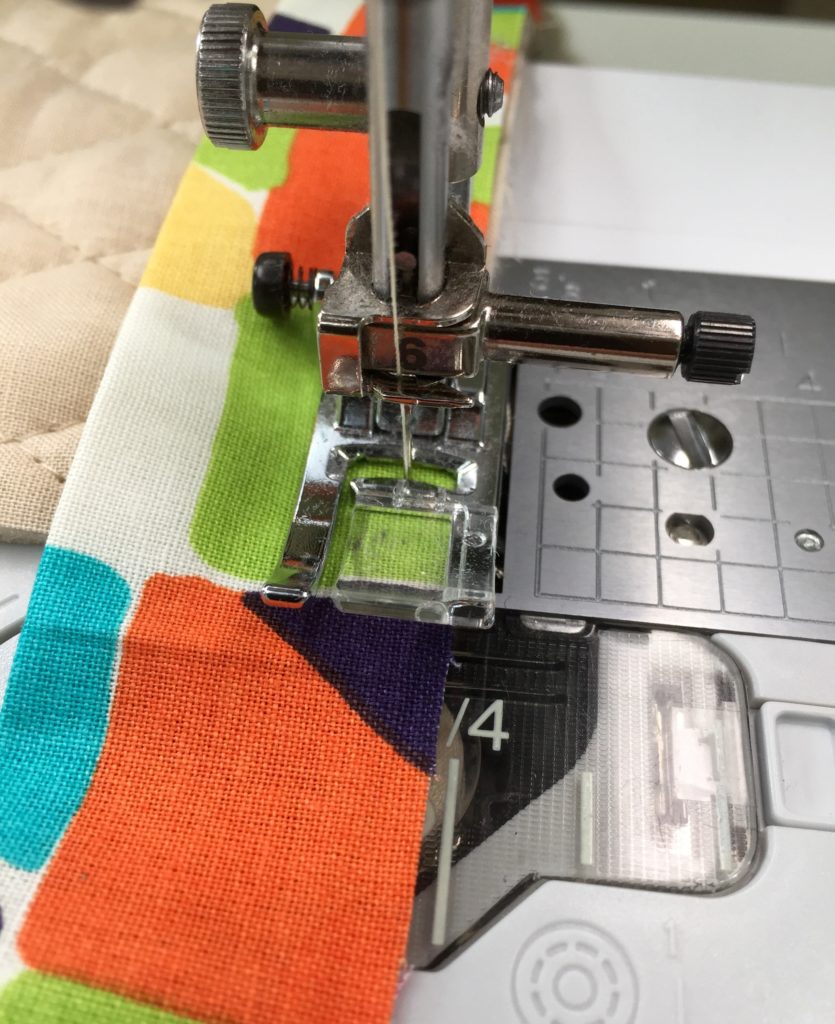
Stop here. Just STOP! Now is the time to have your needle down function in action because we need to lift the presser foot. Turn the binding and base fabric to be 45 degrees to the needle. Lower the presser foot and sew off the edge.
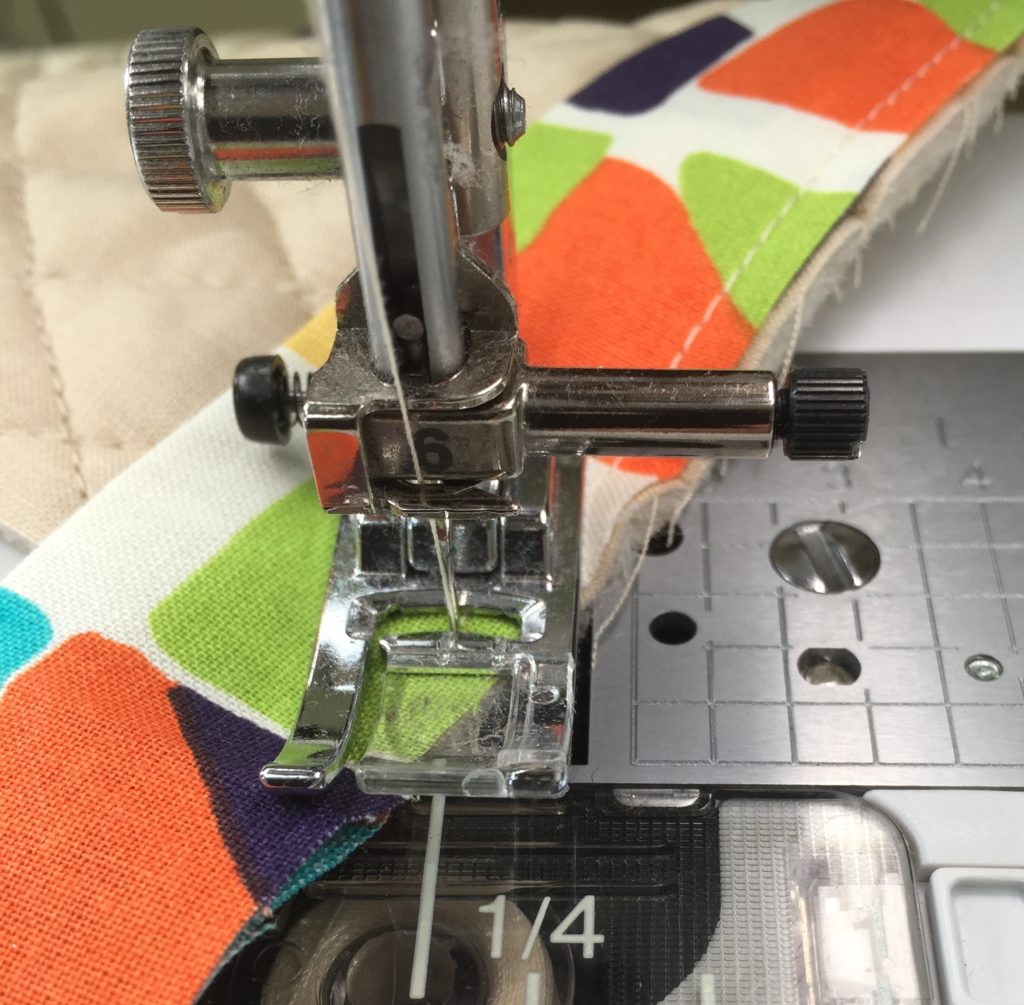
The stitch line should look something like this:
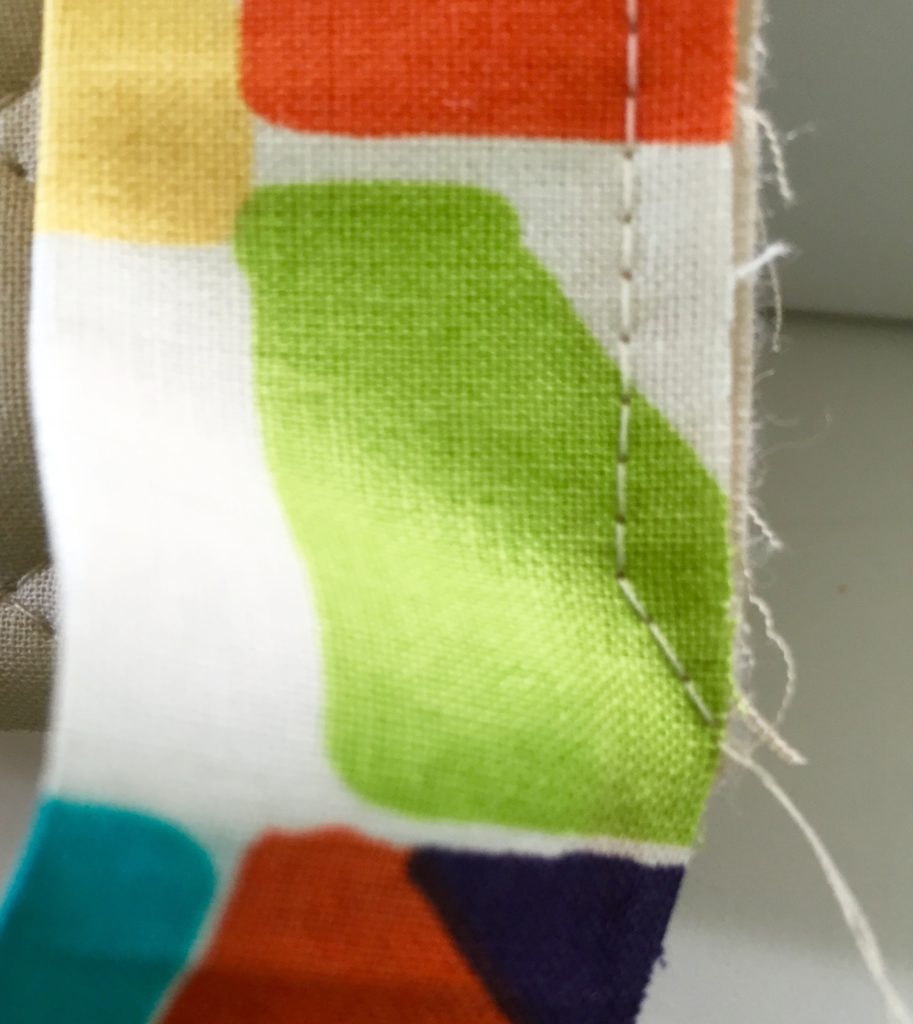
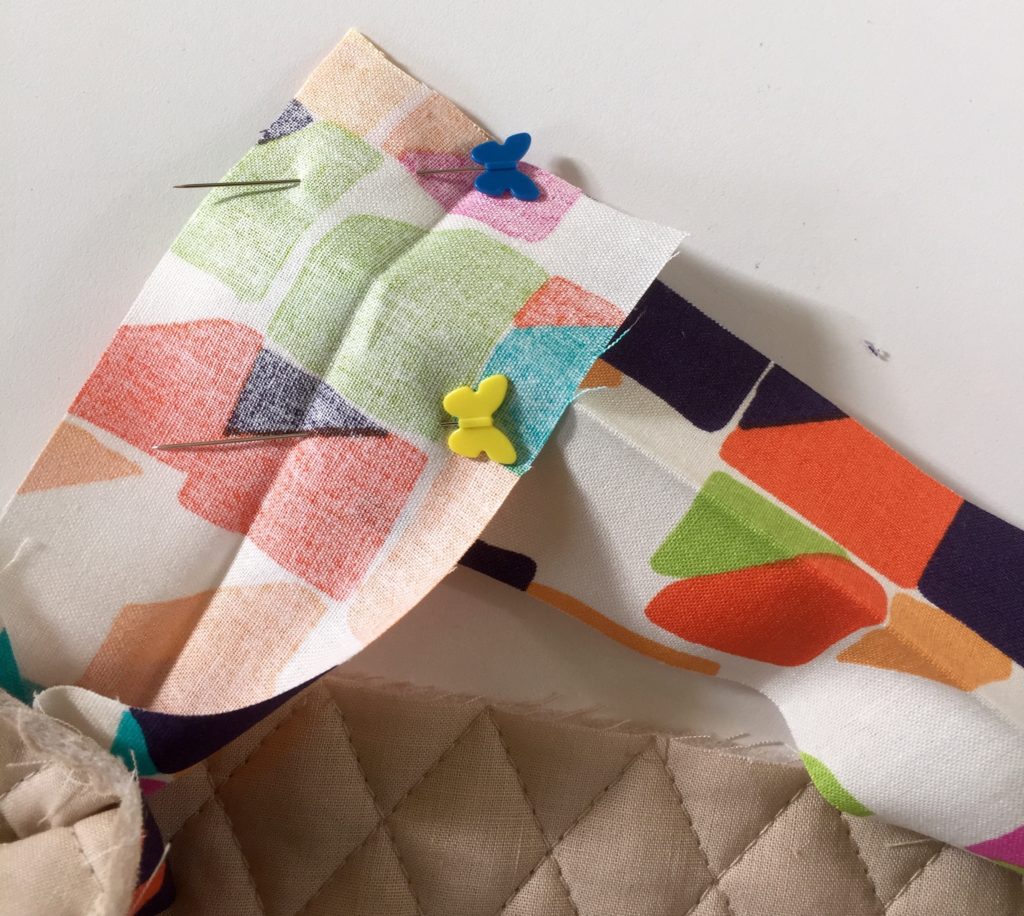
There is a theme here…..45! Now take the binding and fold it back 45 degrees. (Or fold it to be even with the bottom of the cover)
Now fold it back on top of itself (keep that first fold pristine!) and align it with the bottom edge of your cover.
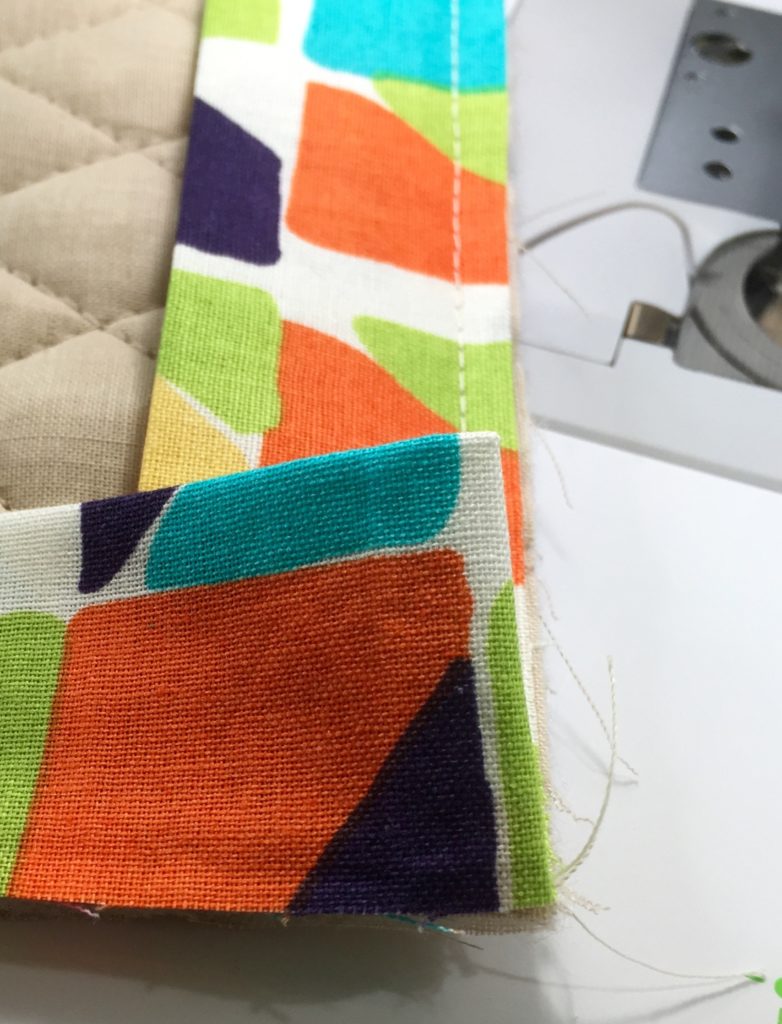
It should look like this. From the back side it will look like this:
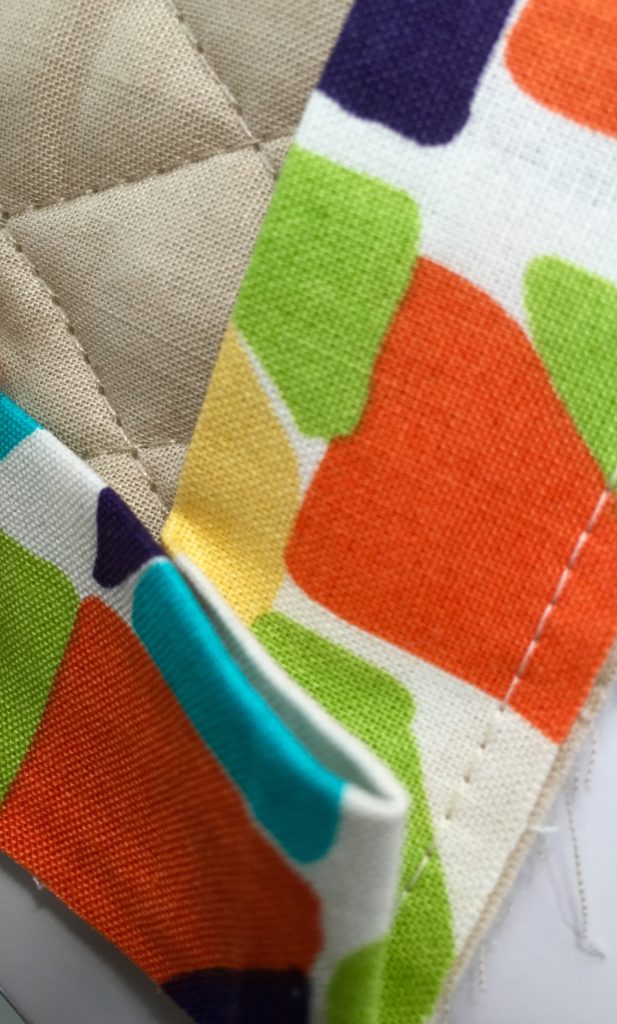
Take the time to get everything all hunky dory and laying flat, straight and neat.
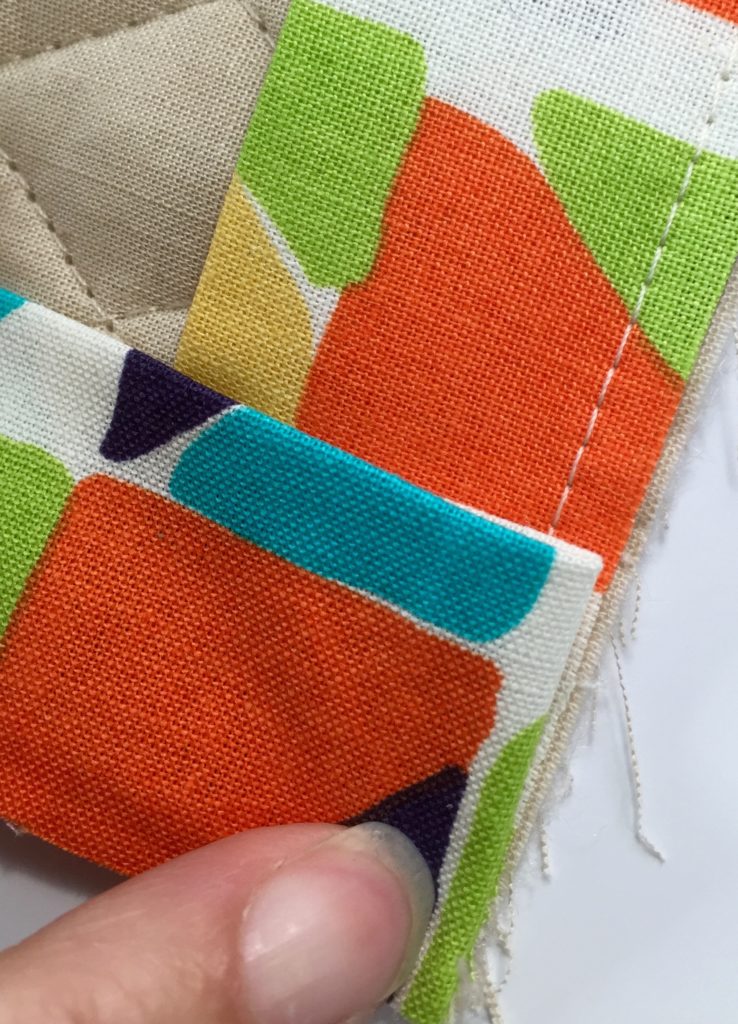
A hand model was paid millions for this shot, show some appreciation would ya?! This attention to detail will determine in how your binding folds at the corners when you sew it to the front or whether you throw it in the floor and wail at the top of your lungs. Really. It is that serious.
Now keeping everything in place, put it back in the machine and begin sewing down this side.
Backstitch if it makes you feel better, but it isn’t necessary. Continue sewing binding to the cover until you come to the next corner. Repeat the process above. Soon you will be turning that beloved 4th corner and coming to the end…….OR IS IT????
Once you come around that last corner don’t get carried away and sew too far. You want to leave a tail on this end as well with about a 10″ opening between the beginning and ending of your binding.
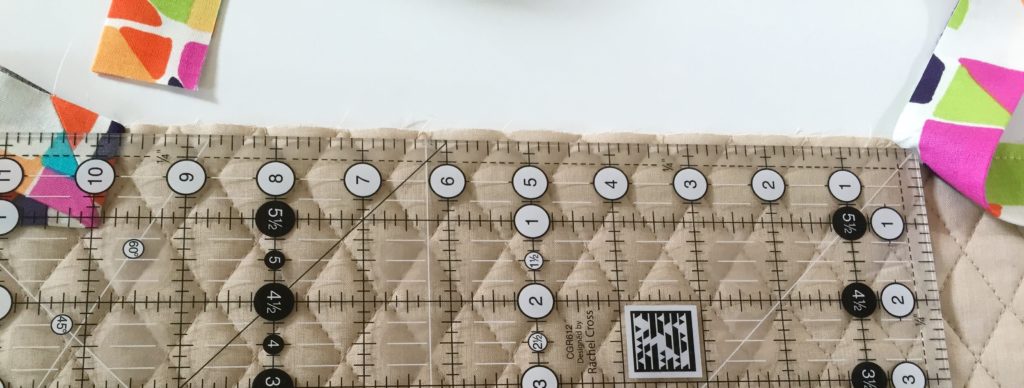
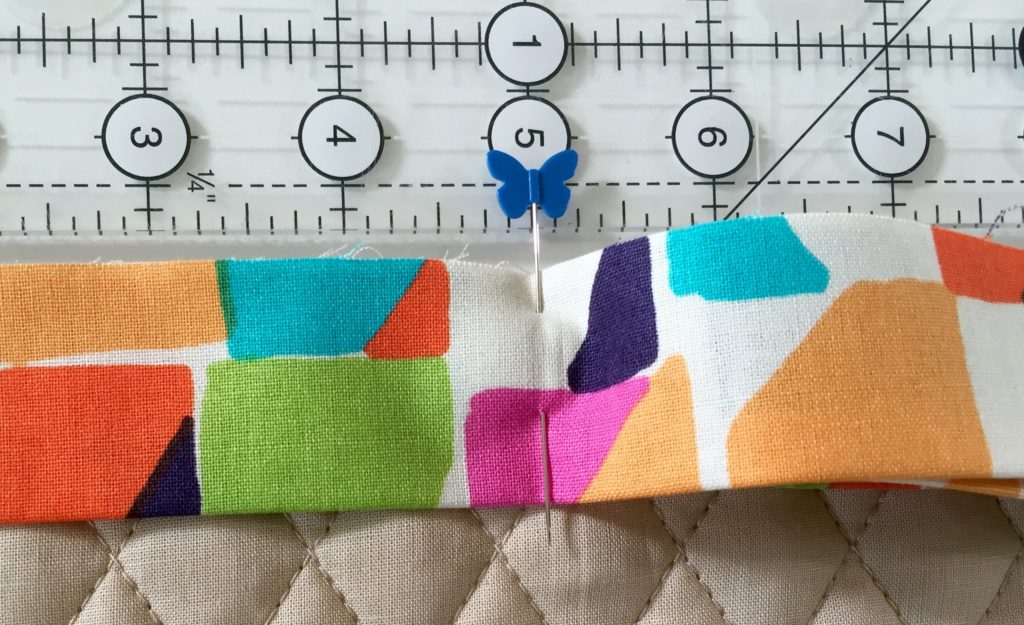
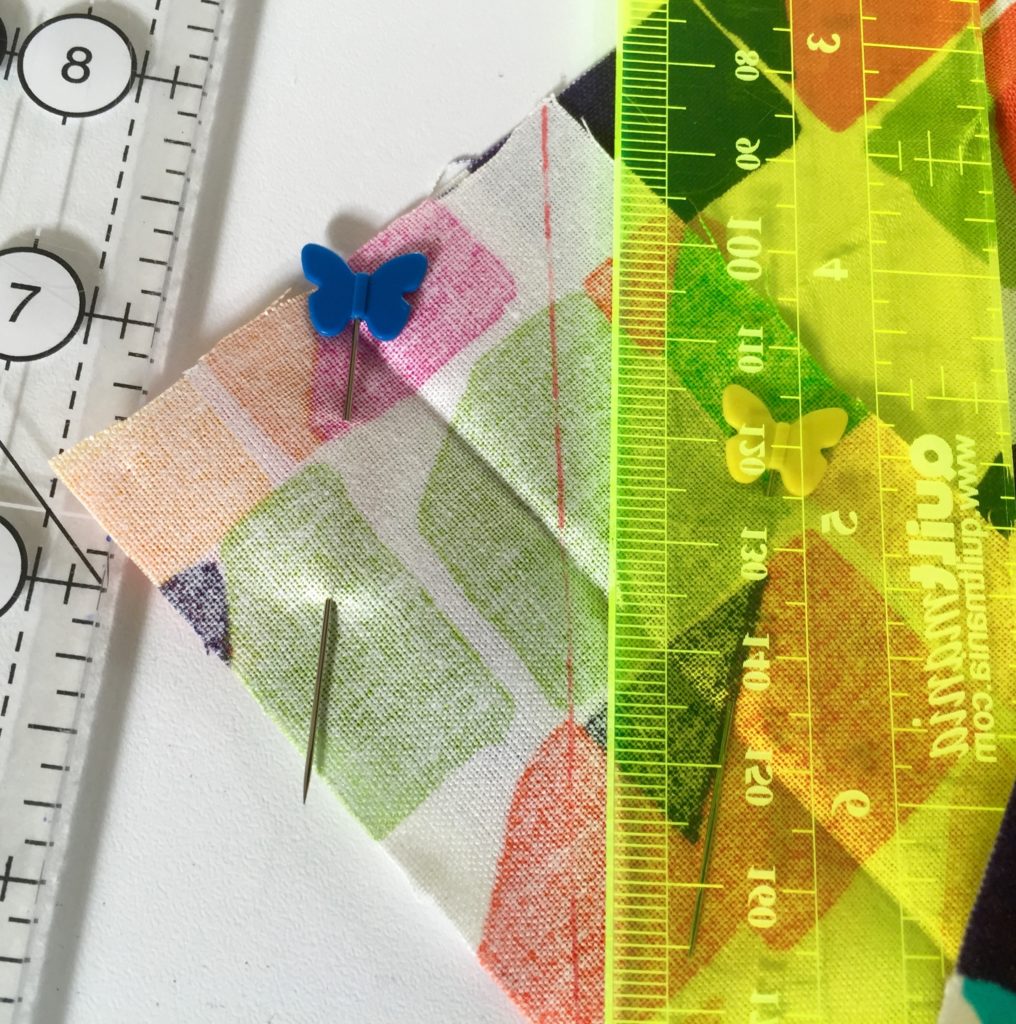
This ruler is important so keep it handy.
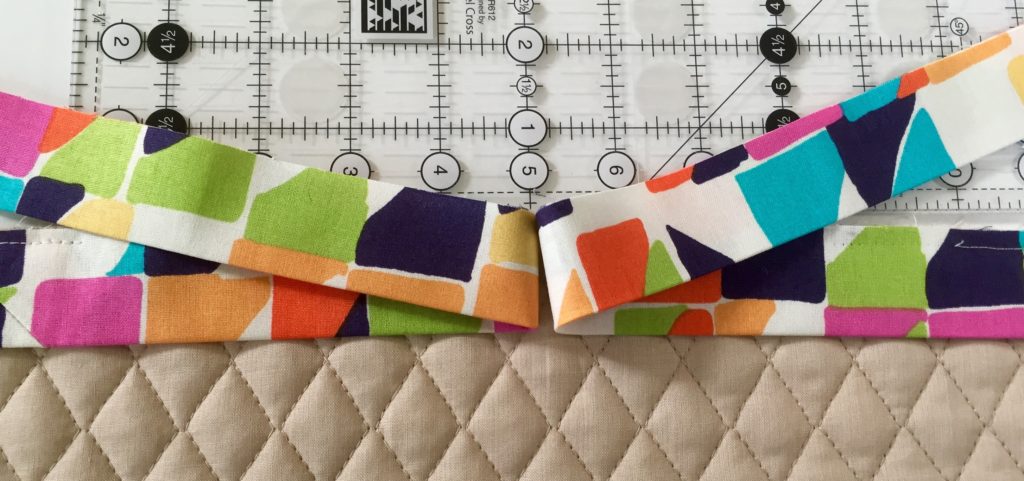
Position your ruler at the top edge of your project and fold in the tail of your LEFT piece of binding to the 5″ mark.
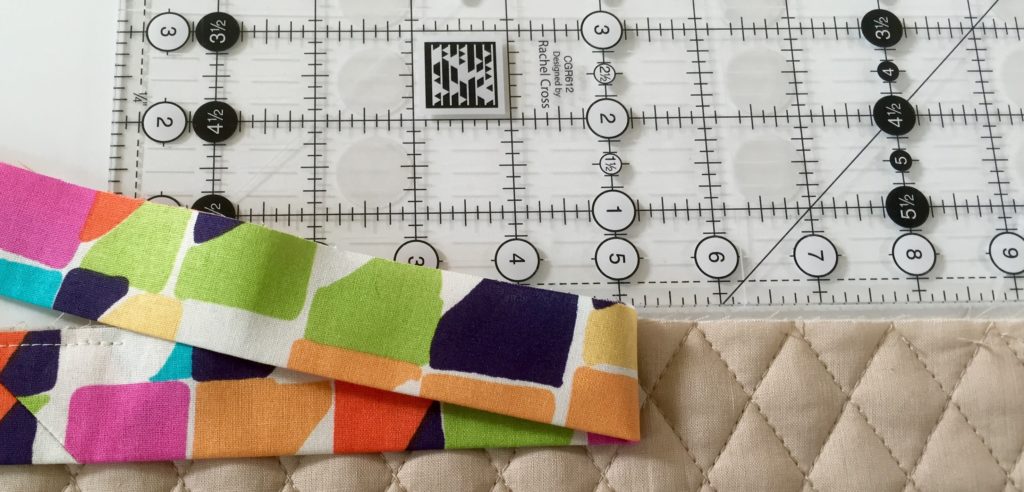
Fold the RIGHT side in to meet in the middle at that 5″ mark.
Do this to make sure you have enough extra binding and that everything is going to work as it should. Like hair, once cut there is NO going back!
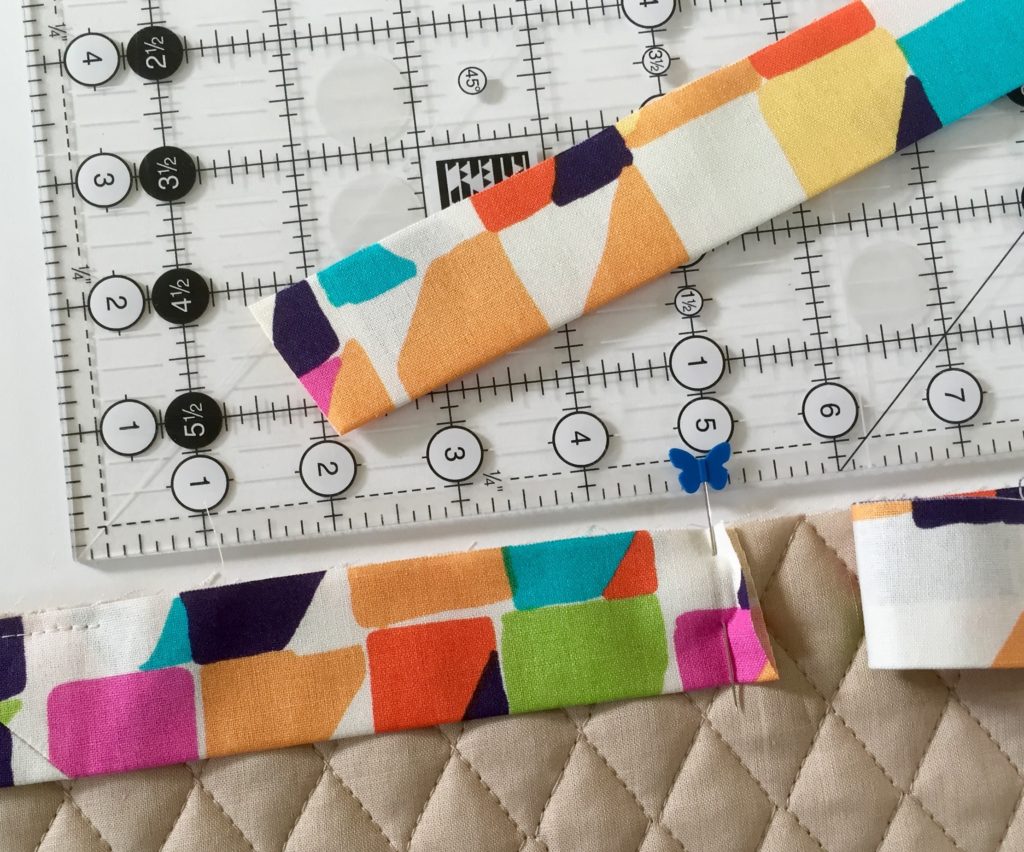
On the LEFT side, pin the binding to the backing at the 5″ mark.
Be sure that you have the RIGHT side of the binding out of the way, take a deep breath and then CUT OFF the left binding strip next to the pin
Scary huh? Stay with me—you are doing great.
This next measurement is important….on the RIGHT tail add X to your length with X being the width you cut your binding strips. HUH? Yeah….I cut my strips 2 1/2″ wide. So, will cut my RIGHT strip to have a 2 1/2″ overlap on top of my LEFT strip. Or another way, butt your folded edge of RIGHT strip to your now trimmed LEFT strip. Measure an additional 2 1/2″ past that and then cut the RIGHT strip. Keep in mind if you use a different width of binding you need to use THAT measurement.
Mark where you need to cut and then…..
Snip away the extra. This is either stressful or freeing….The first few times I used this method I was freaked out to make those cuts but now I am happy to be at the end. Or nearly so. We still have to connect the right side and the left and make it bumpless and beautiful
Pull the RIGHT tail away from the backing and fold it open with the right side up.
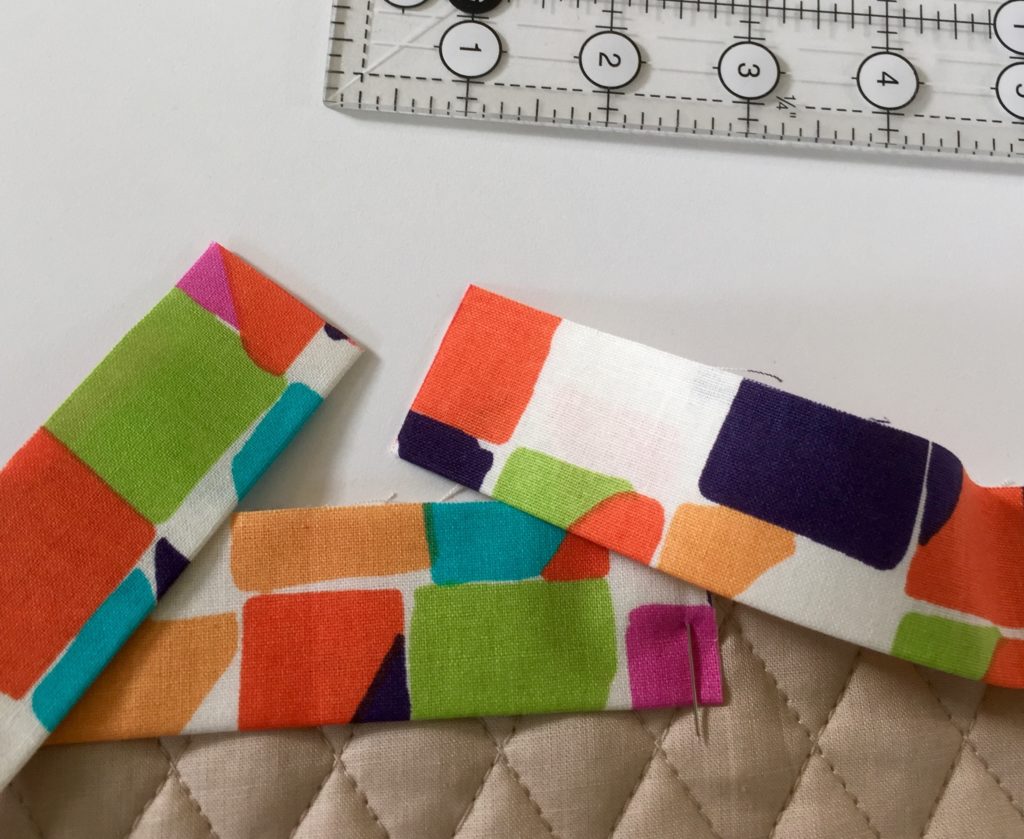
Next, unpin the LEFT side, unfold it and place it on top of the RIGHT side with the pretty sides of the fabric facing each other.
These tails should be right sides together at 45 degree angle, just like we joined all the previous strips. Since there isn’t a lot of fabric to work with and it is a bit fussy, place two pins into these strips to ensure that there is no twisting and slipping. Mark a line from the top left to the bottom right of the LEFT strip.
This is your sew line. Carefully position the strip in your sewing machine making sure that the backing fabric is out of the way.
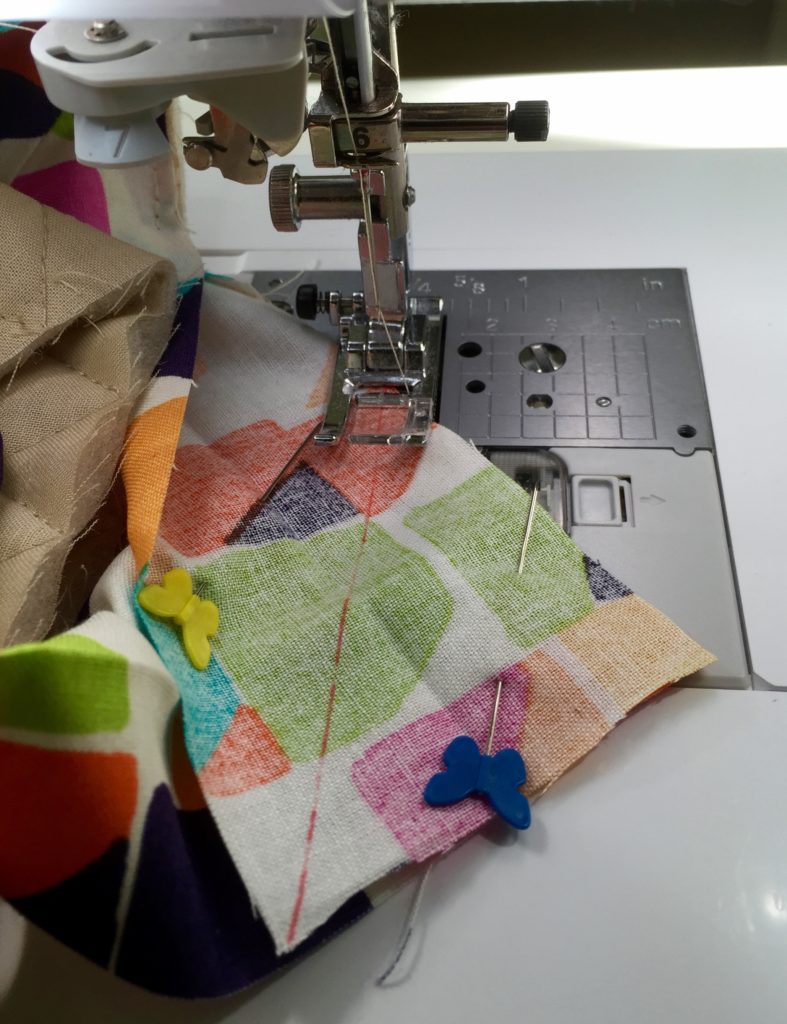
It will seem like a twisty, twirly mess but be the boss of that fabric. Slowly sew the length of your marked line. Once it is sewn, remove the pins and pull the binding flat against your cover. It should fit well with very little extra fabric.
If you are satisfied with the fit, then it is time to cut away the excess fabric from the two strips we just stitched together.
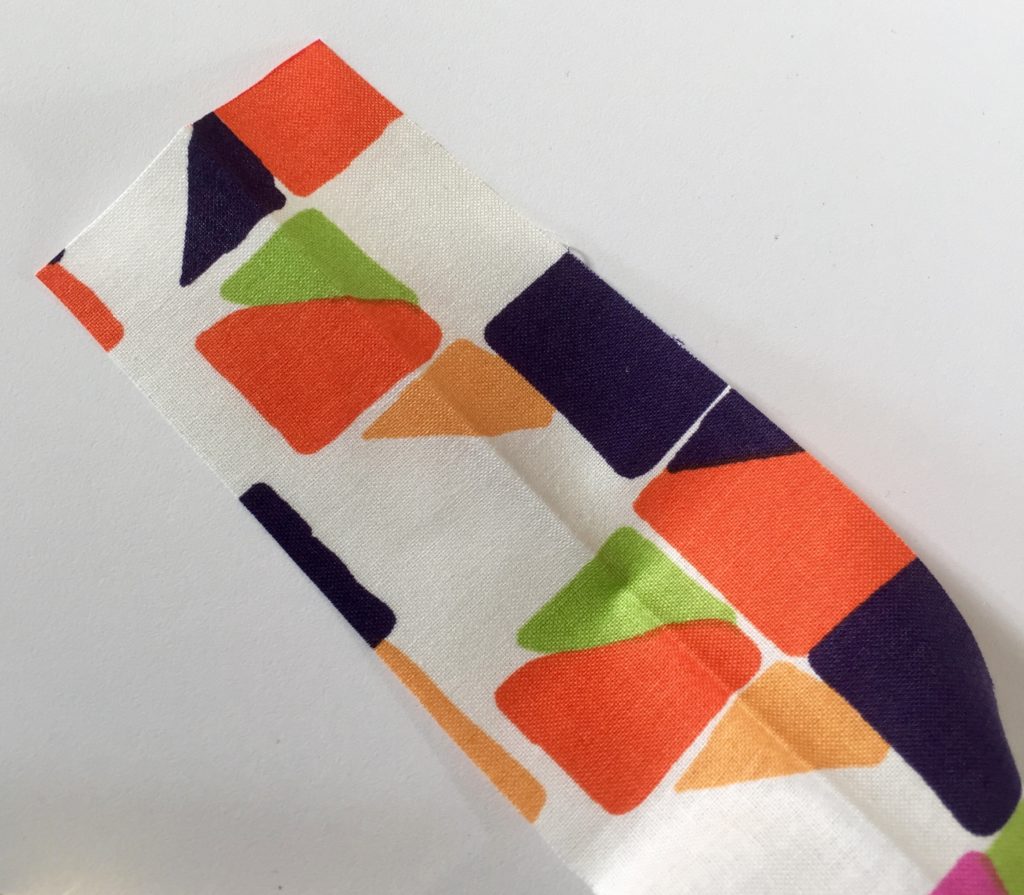
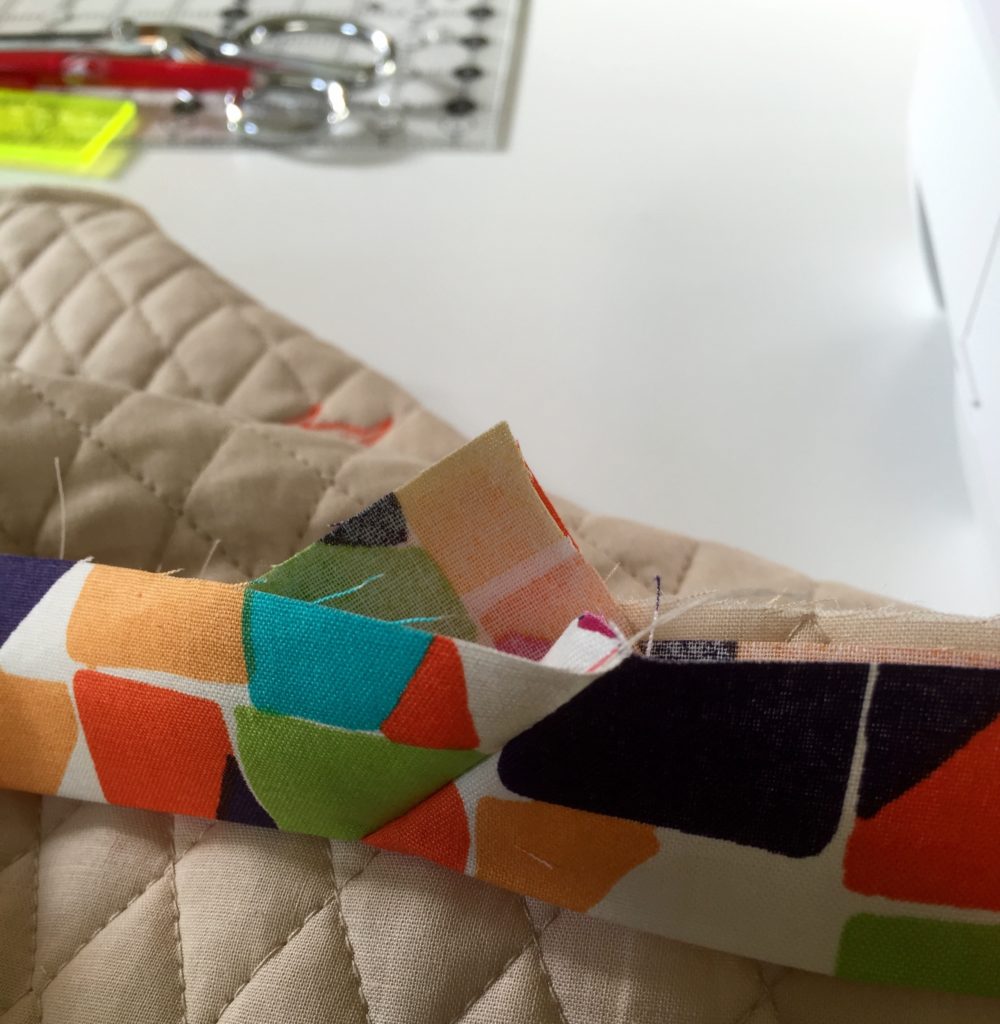
Leave a 1/4″ seam allowance and trim away the corner. Iron open your seam allowance and your binding strip should now lay flat (and with no bump!) on the cover. Simply brilliant!
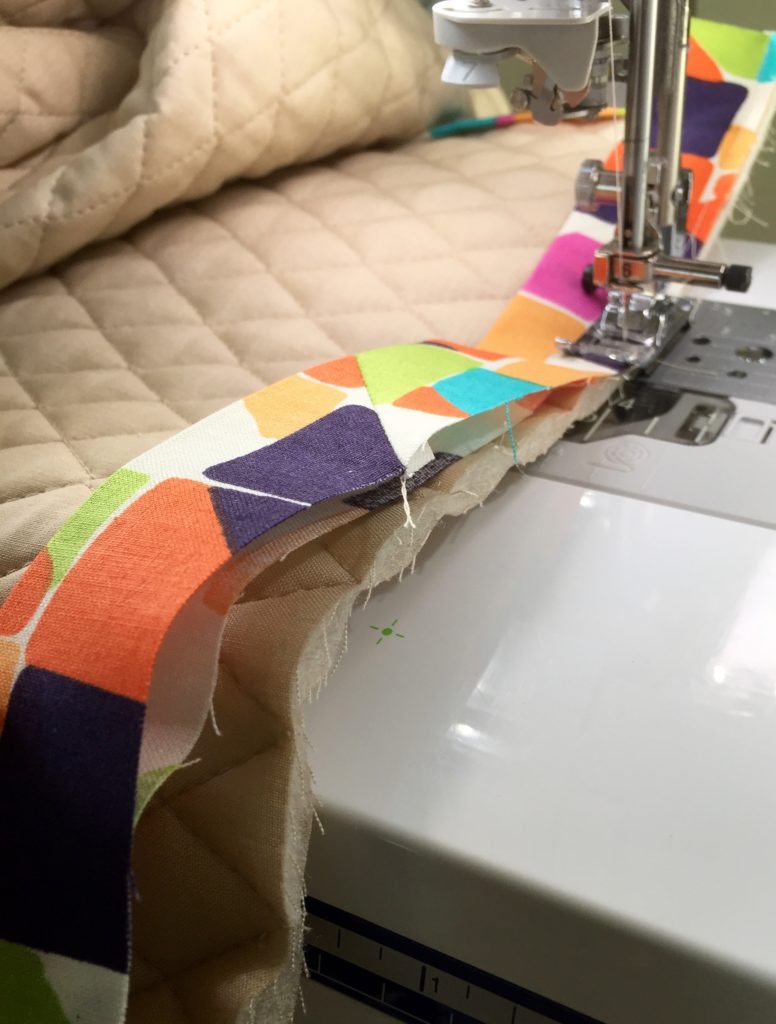
Stitch down the remaining binding to the car cover and you have now attached your binding with a clean and continuous strip.
Did you miss part one? You can find Part One Here
Next week we will add the ties and turn the binding to the front to finish our car cover project. See you then!
