Later this week my mother-in-law will be celebrating her 84th birthday. She is also a great-grandmother again with the arrival of Chloë. Unfortunately, technology has left her far behind and she doesn’t use a computer or text, so there isn’t a way to electronically share any photos of this dear little girl. But where there is a will…..
Creative Solution
I gathered some of the wonderful photos that mom and dad have shared with me and the mister over the past few days. All were sent by email or text, so some of the images aren’t the best quality. But part of being creative is learning how to use what you have! The mister kindly printed out a nice selection of shots and then I got busy on creating a bespoke brag book.
Because all of the photos were printed out on 4×6 glossy stock on a personal printer, I wasn’t the slightest bit reluctant to crop the photos since I knew I could always print another. I cut heavy weight white card stock to 4×6 size making enough cuts to account for the amount of photos that I was going to include. Then I used a small patterned cardstock paper selection that was 6×6.
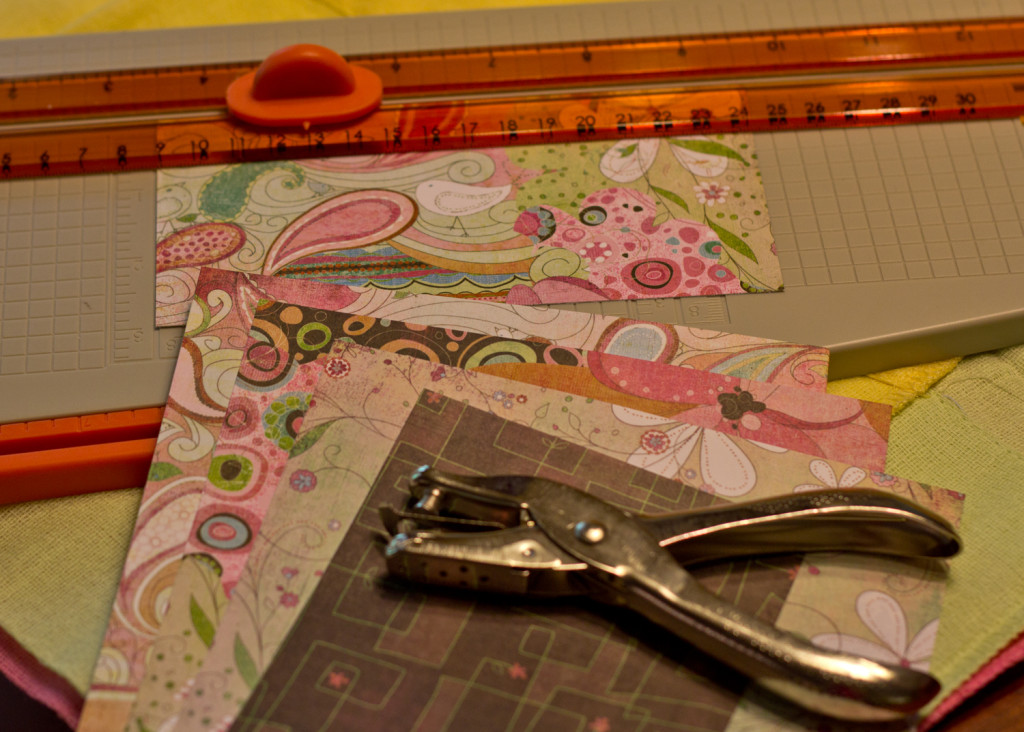
Since the patterned cardstock was the length that I needed, I simply trimmed the sheets into random widths….about 1/3 to 1/2 of each piece to serve as an embellishment instead of a true background and yet not take away from those all important photos.
Adhesives are a personal, personal thing. I know what I prefer. Use what you like but here I used my Scotch ATC gun to apply a thin line of adhesive around the reverse edge of the decorative card stock. I did the same with each of the photos. Just don’t use white glue!
If you aren’t sure of what type of adhesives are available or what to use in a specific scenario be sure to visit This to That. Probably WAY more than you will ever want to know about adhesives and glue!
When laying out your book be sure to allow room at the edge for binding….in other words, don’t butt your pictures up to the edge and then punch holes in people’s heads. Give your layout a moment of thought. Also remember that you will need to slightly change placement for the “front” of the page and the “back” of the page. You don’t want your reader to have to keep flipping the book over and then over and then over. I think I am dizzy now.
Remember to leave a margin to the inside or binding edge of the book and check the orientation of your photos before committing to their placement. You want your book to do three things: Flow, Entertain and Work.
Every Book has a Cover
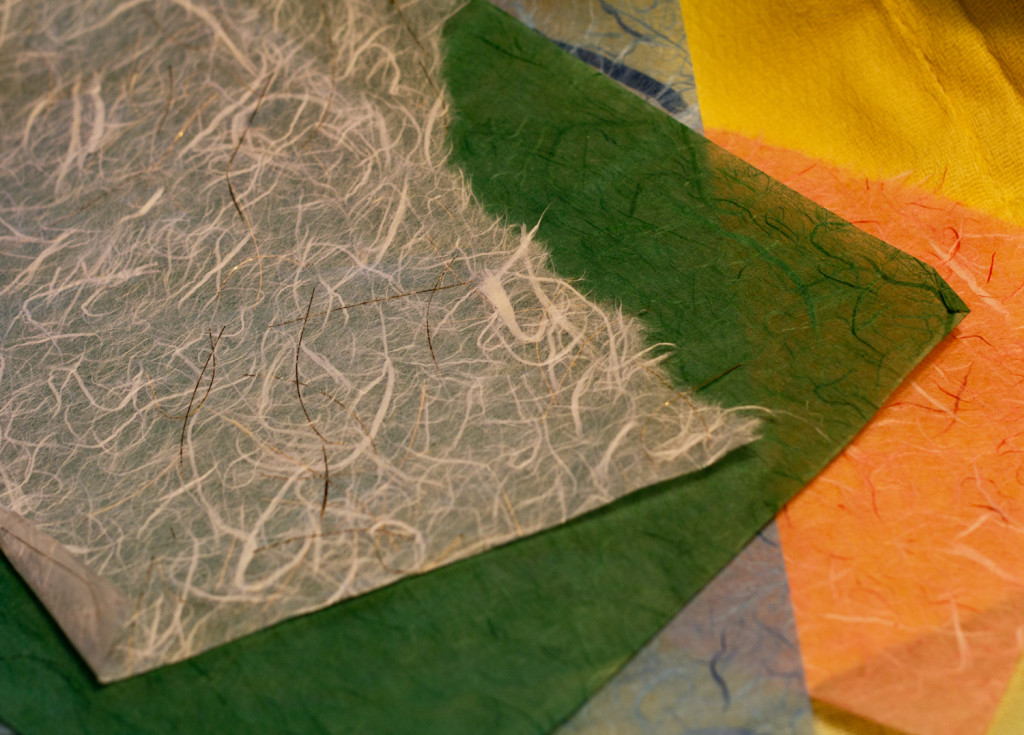
I chose to use mulberry paper for the front of my little book because it is handmade, organic, soft and pleasing to both the hand and the eye. I merely eyeballed the measurements and used a water pen to “paint” around the perimeter. Then using gentle tugging, the wet paper pulls away in these wonderful fringey edges. The process always amazes me.
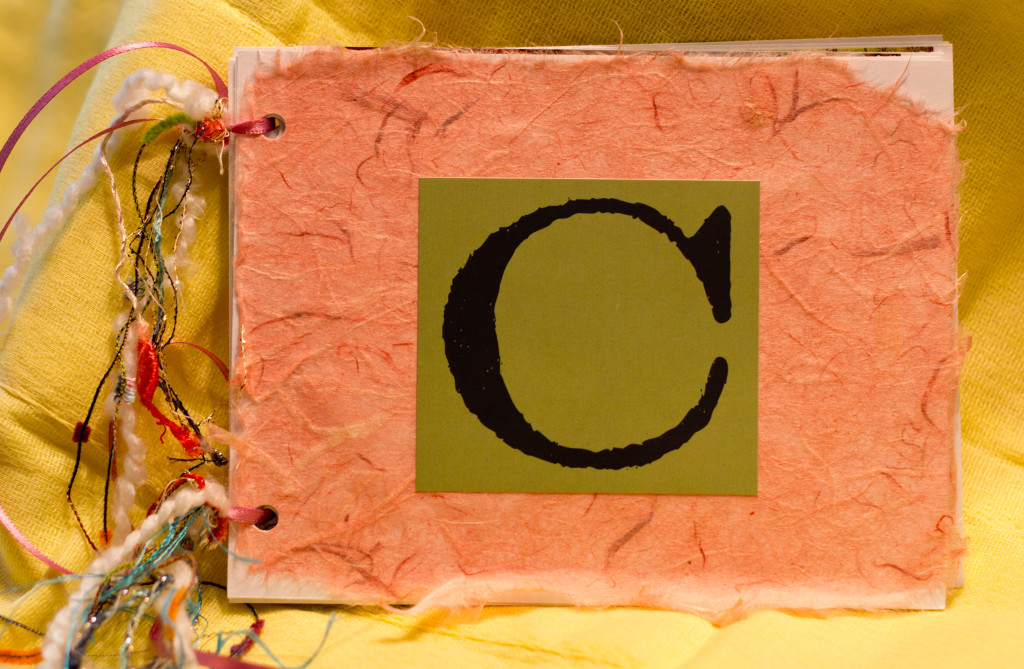
Again I adhered this to the front cover with my ATC gun and then I placed a large C sticker on the front. On the inside cover I wrote out Chloë’s full name and birth stats so that great-grandma would have this to use as a reference.
Once I had all of my pages arranged, the layers of background papers and photos adhered, it was time to do the final assembly. Using a regular size hole punch, I created a hole towards the top and bottom of the left edge of each page. To keep the holes aligned I used the previous page as a guide for each following page making sure that I kept everything in order. Nobody wants a wonky book whose story is out of order!
Now for a bit of embellishment. Part of creating is knowing your customer. I know mine and she doesn’t like mussy, fussy stuff. So, in this case I kept the book very low key and the embellishment to a minimum. Save that effort for someone else who adores that kind of thing. Trust me. Seriously.
A bit of ribbon and some colorful, artsy fibers were slipped through each hole to finish the binding. But don’t tie too tight! You have to be able to turn the pages without tearing them or struggling with them. It may look fantastic but if it doesn’t work…..
Now a quick view inside the finished photo book:

I think great-grandma will be pleased with the book, but more importantly she will be thrilled to see Chloë and delight in the latest addition to our family. Pretty nice birthday gift if ya ask me.
Beautiful and incredibly thoughtful!
B, I LOVE this!!
How sweet of you (pure mush here) for a great-grandma!
Congrats to you and Steve on the new family addition!