Last week I shared with you how I had opted to stain my wood stair railings as opposed to ripping the ugly bastards out by the roots. In case you missed the first part, you can follow this link right HERE and then join us back here for the finale.
Now that I had completed the black stain for the spindles on the first and up to the second floor, I then stained the rails with that wonderful walnut gel stain.
Just in case you didn’t remember how crazy, ugly orange it was before:
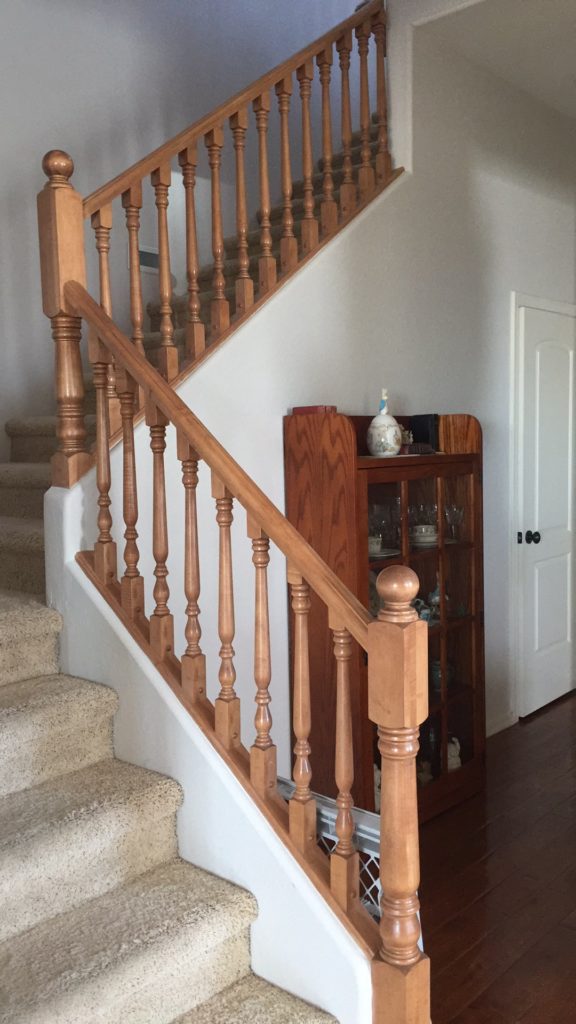
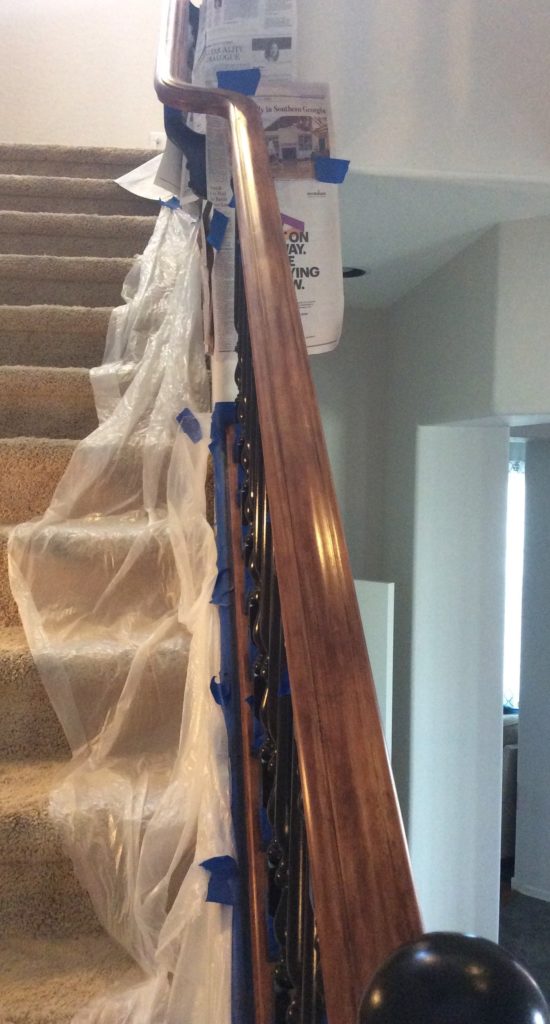
That is INSANE! So is that stupid carpet, but that is an issue for another day. Back to our regularly scheduled program. Once I had completed the lower portion of the stairs, I wanted to let it dry for a few more days before I put the polyurethane on. But then I went out-of-town, came back, fell ill, had company, got better and 4 weeks later I finally drug my bucket of staining goodies out to start the process all over on the upstairs spindles. Fortunately, I had sanded the entire railing system the very first day, so I didn’t need to do that. But I did wipe everything down again because I live in the desert and it is dusty.
Here is what I started with:
![]()
At this point I was bemoaning the fact that I even started this project. Yes, it was a LOT of work. But a job half done is not done at all and it was time to stop whining and get busy.
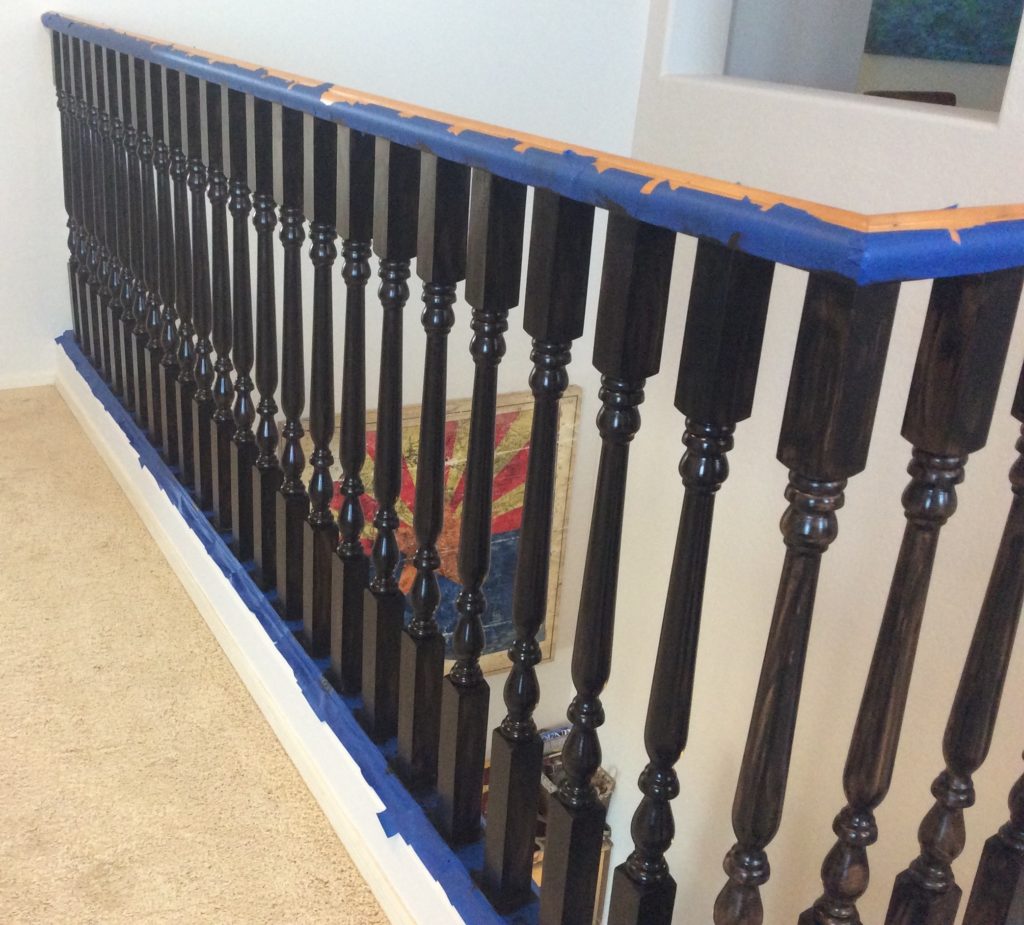
I had to eradicate the orange from my life one.spindle.at.a.time.
It is true, I am expert at taping things off. Remember that I said prep is king and when I took the tape off the lower part of the stairs, I had less than a dozen places to touch up. To me, touch up is a pain and so the preparation is worth it. It also makes all the difference in whether it looks professional and tidy or not. The beautiful thing about this stain is that is a gel, so unless you totally overload your sponge brush, it won’t run or drip. It flows on nicely, is easy to control and gives great coverage.
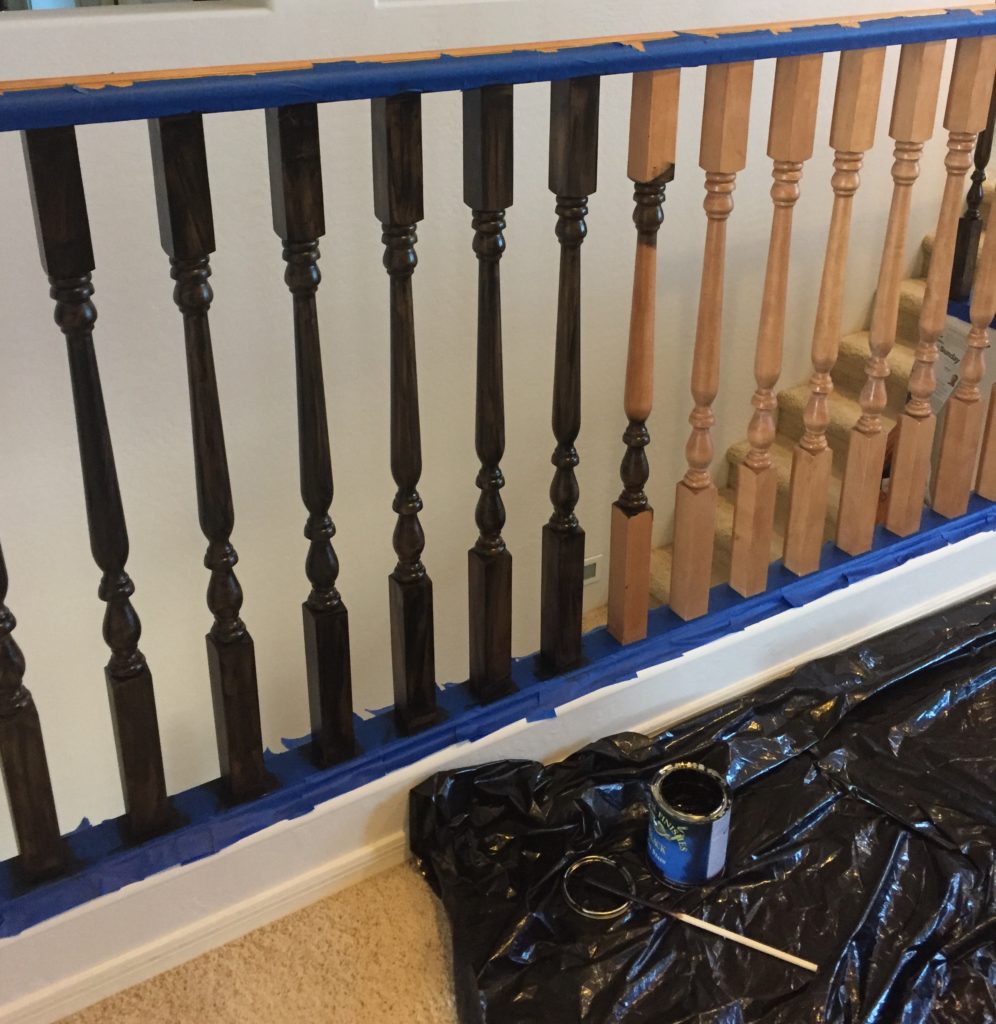
Don’t let the first coat discourage you. It doesn’t look like much but it builds nicely in coverage and depth of color.

Above is just one coat and some dreadful orange spindles.
Below:
The spindles on the left have two coats and from the corner and on the right, just one.
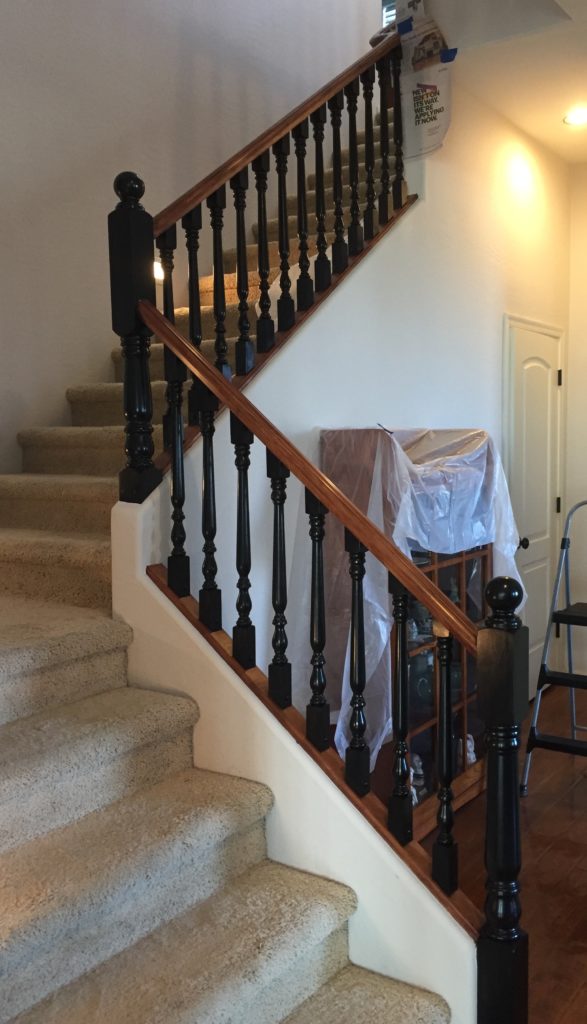
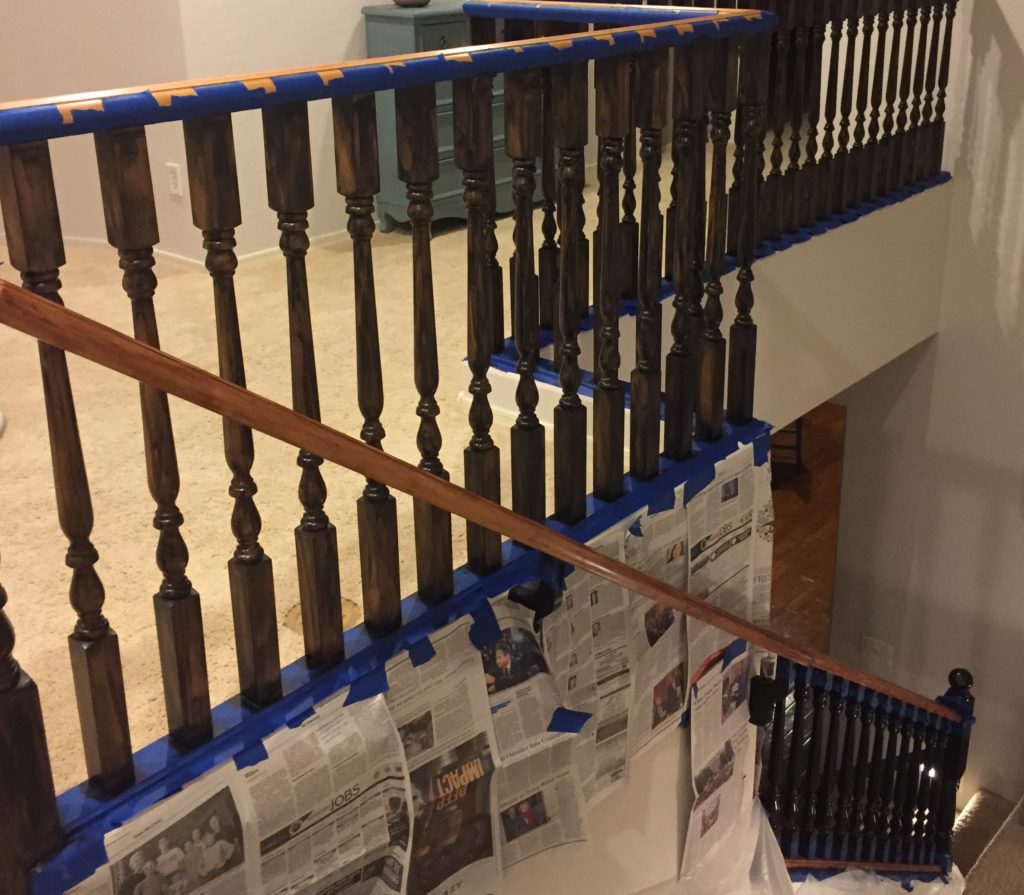
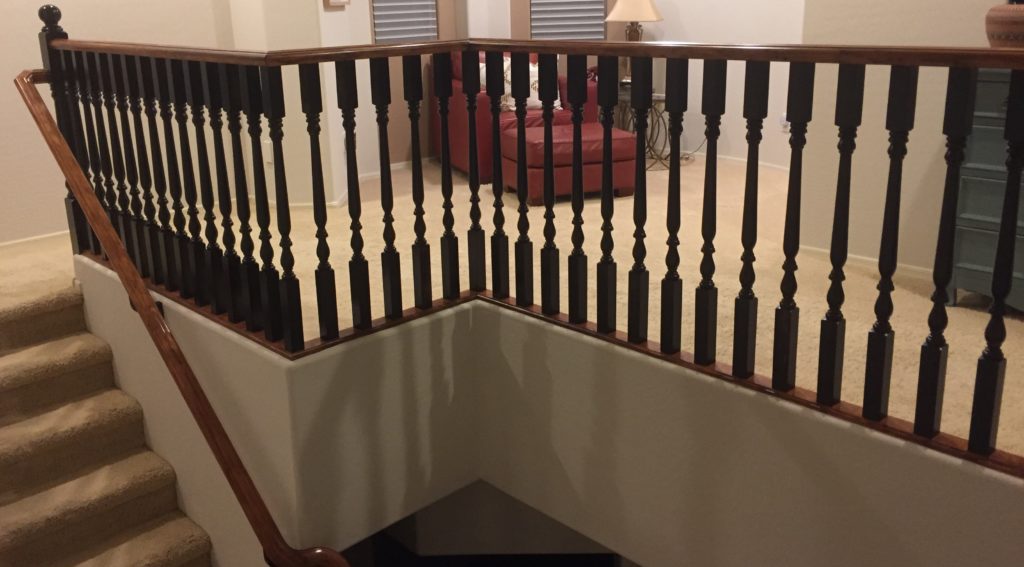
The next image shows the finished spindles and stair-rail for the lower half of the stairs and the unstained rail and single coated spindles on the second floor.
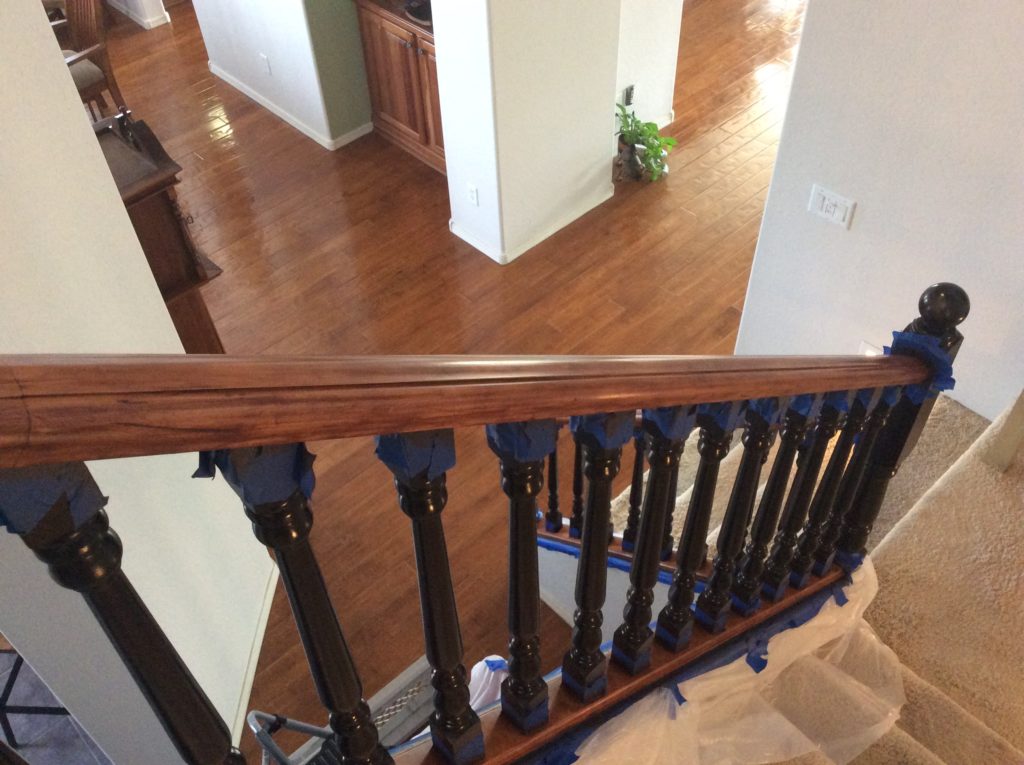
This image shows the handrail stain nearly matches the hand-scraped wood flooring. As these two elements don’t meet anywhere, the match didn’t have to be exact but it did need to convince the eye. How did I do?
After about 3 weeks of total work time, I finished this project. I have to say I am pretty stoked about it. I will always hate those stupid cannon balls and I wish that I could replace those newel posts. But for less than 70.00, yes, just 70.00 I made this stairwell look completely different and decidedly more modern. Remember I mentioned that the mister said there was no way that those two quarts of stain would do this whole project? Well, he wasn’t just a little wrong….he was a lot wrong. The fabulous thing about General Finishes products is that they go a LONG way. There is 3/4 of the quart of walnut stain left and about 1/4 of the black gel stain. I didn’t even come close to running out and I can’t say enough good things about their paints, stains and finishes.
After I finally peeled off all the tape and did the required touch up, I put 3 coats of satin polyurethane on the handrails and the newel posts. I put one coat on everything else. They just won’t get that much wear.
Here are a few last looks at the finished project:
![]()

Before and after–changes the way the entire space feels
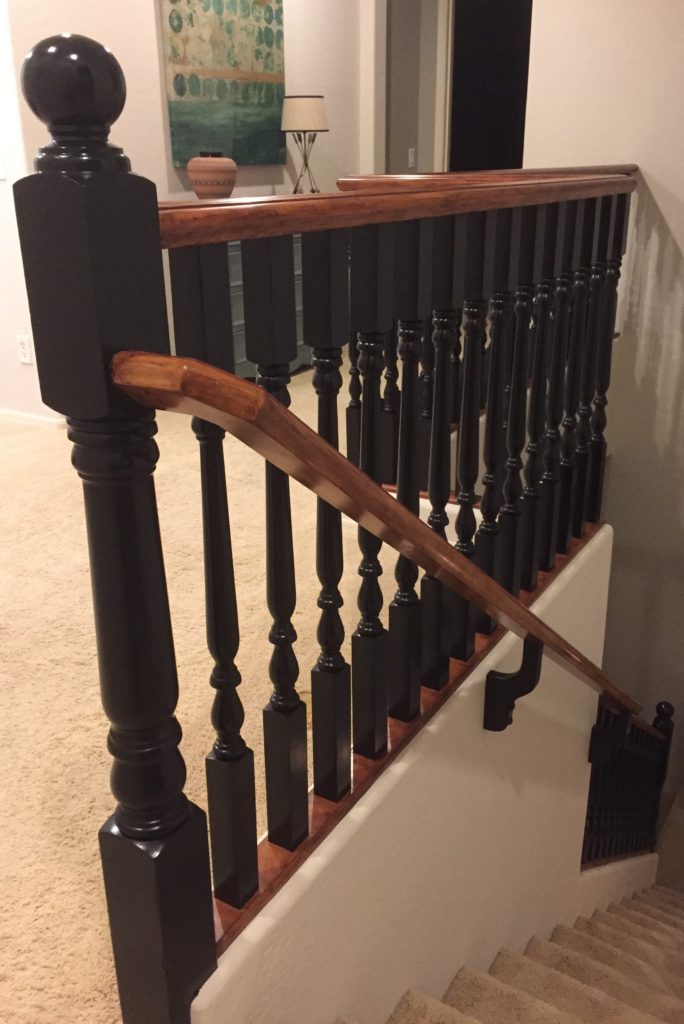
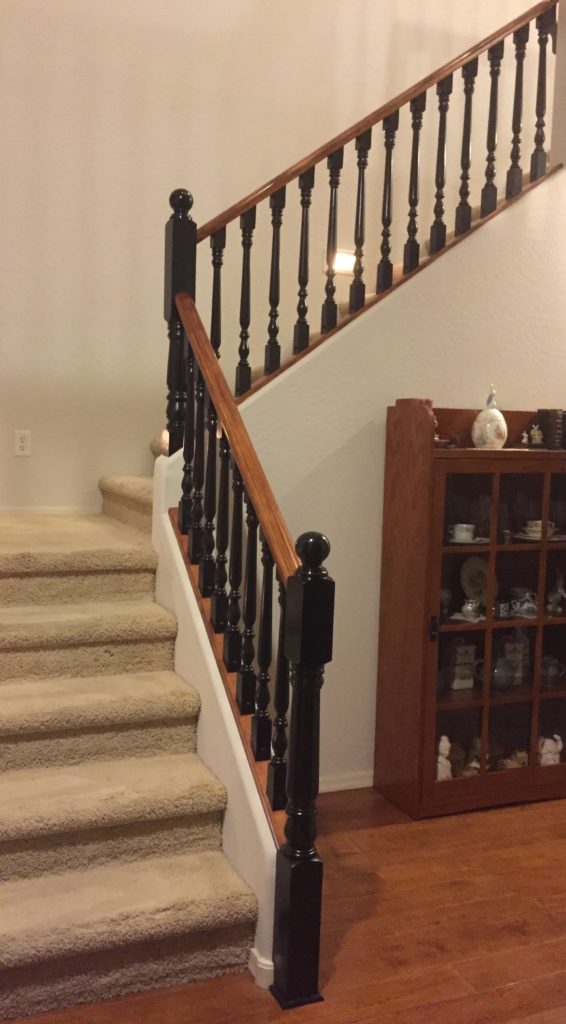
Done! And so much better.
If you decide to tackle a project like this, I want to hear about it. But first, here are a few tips.
Use General Finishes products, they really are a dream to work with. You can find their products HERE
Don’t over prep! If you used GF’s gel stain products you do not need to sand down to bare wood. Knock off the finish and make sure everything is smooth, clean and dust free. Don’t over think this.
Do over prep! Make sure you use plenty of good quality painters tape, draping and/or plastic to protect your belongings and other areas. Take your time with this step and your finished project will look clean and professional.
Allow enough time to finish your project. Know how many coats, dry time and prep time it will take to complete your project, then add 15%. Pick a stopping point in case you have to abandon your project and come back to it later. I had a lower section done, upper section not done for nearly a month and admittedly it looked silly. But I didn’t have plastic on the stairs or leave any tape in place. I had a designated stopping point and worked on this in phases. My guests didn’t care about the rainbow stairs but they would have cared if they had to maneuver around my work items.
Use sponge brushes to apply and wear two layers of gloves. I like black polish as much as the next girl but I do not like black stain on my hands. Use a small cheap artist brush to reach small spaces.
Ventilation and clean up are important. Make sure you have clean airflow in your work area and dispose of all used work items properly.
Enjoy the process and finally, stand back and admire your work!
