A couple of years ago we moved cross-country and it was one of the best decisions that we have ever made. We absolutely love our new home and the great friends we have met. That is not to say that our house was close to what I envisioned it to be. In fact, it has required a fair amount of work and money to get us to where we are today and I still have a few more projects rolling around in my head. I would like to share this one with you.
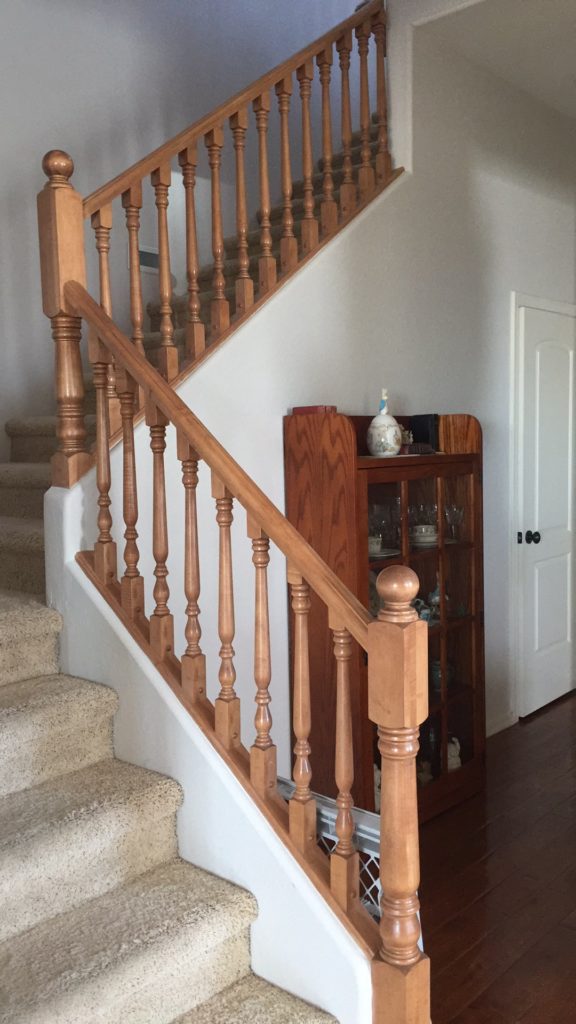
From the early 2000’s, the wood color of choice seemed to be, well, orange. I don’t dislike orange but it isn’t a color that wood should ever be! Our new home had these beautiful hand-scraped hardwoods and this hideous stair rail…….lots of it.
Yeah. But wait, there is more
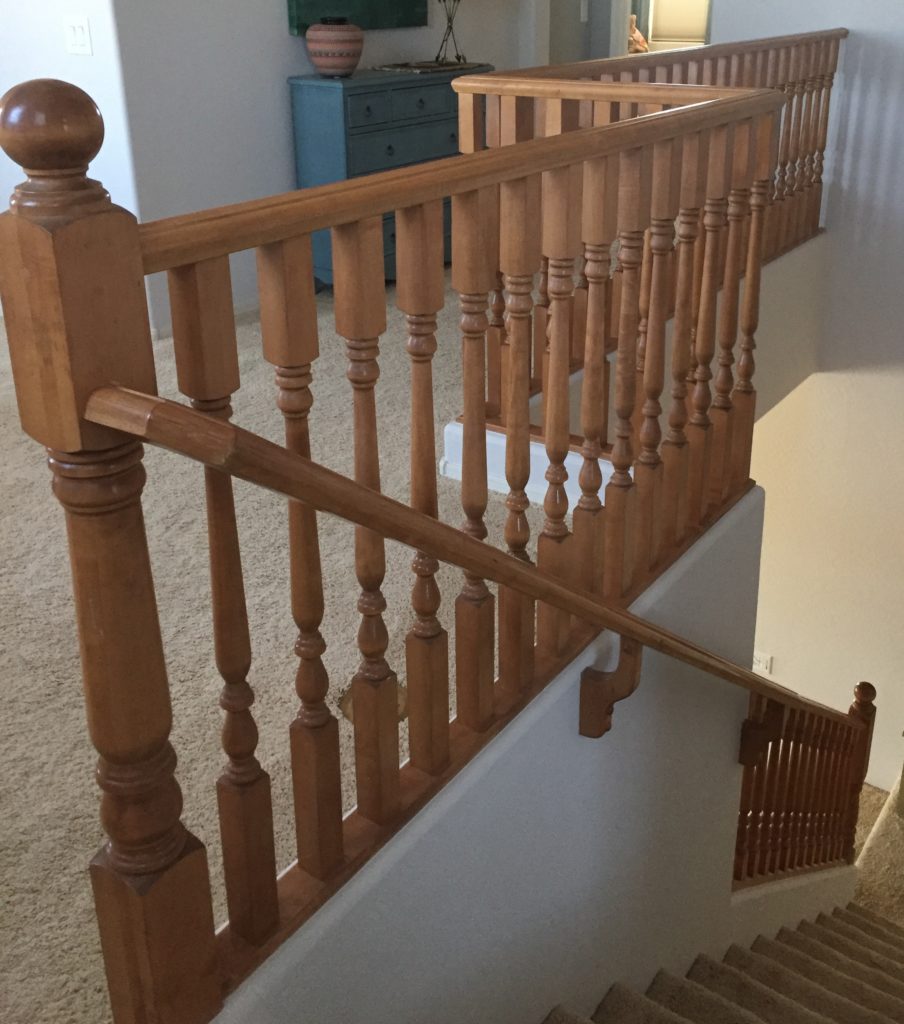
That is a serious amount of spindles and railing. What I *really* wanted to do was rip it out and replace it with wrought iron but first I wanted to attempt to drag this orange mess of stairwell into the modern-day before I dropped some serious coin on replacing the whole thing.
I love my dear husband but he is NOT a painter, so I knew if I were to do this project it would be a solo job. I first did some research and read quite a few blogs via Pinterest about the different methods of staining ugly, ugly, ugly wood. I determined that it would be best if I used a stain manufactured by General Finishes. While most bloggers used Java Gel stain, I opted to use the Black Gel for the spindles and Walnut Gel for the handrails. Since my home is mostly gray walls, I didn’t want to bring in a brown on the railing. Also, the walnut came close to matching those beautiful hardwood floors and there needed to be some cohesiveness. I also chose black because if I abhorred the end results, I would still have a good idea of what wrought iron would look like…..
I found a local dealer for General Finishes and with their guidance I purchased a quart each of the black and walnut gel stain. My husband insisted that I would be making a return trip to the boutique for more stain. More on that later.
Like any wood refinishing or painting project, prep is king. I first wiped down all the handrails and spindles with denatured alcohol to remove dirt and oils as well as dull the existing finish. I then did a light sanding of spindles and handrails, followed by another wipe down with the denatured alcohol. This took me an entire day. Look at how many spindles….I began counting down how many I had left! I let everything (including my arm) rest for 24 hours.
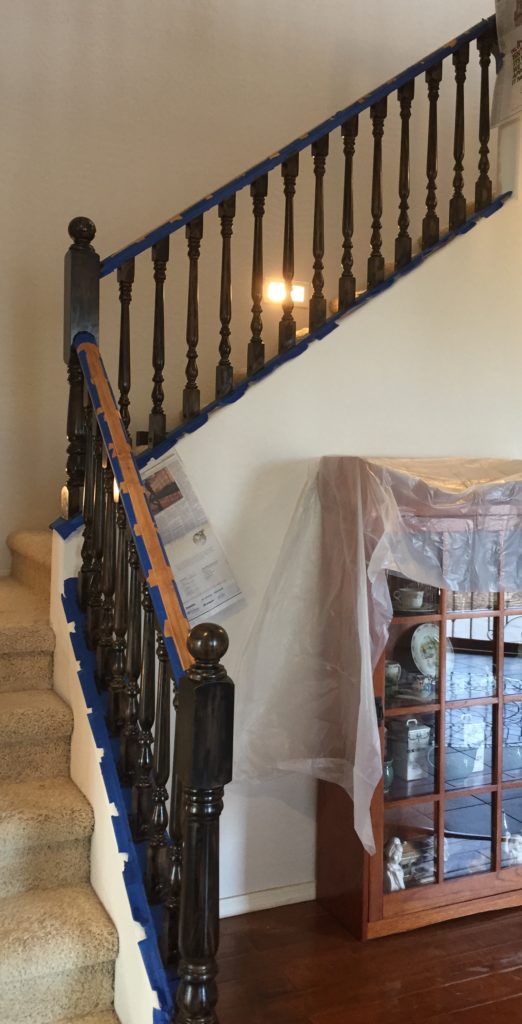
The next step was to tape off the spindles. After the sanding/alcohol affair, I decided that I would complete this project in two segments. First I would finish the spindles/railing up to the landing and then to the second floor. I would finish the spindles and railing on the second floor as the second phase of this project.
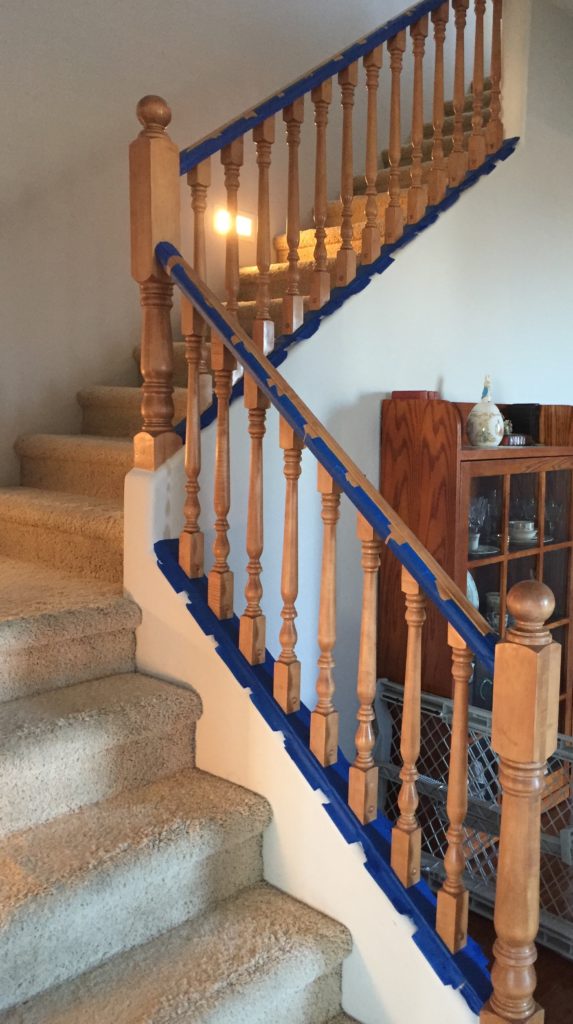
This was less than fun and took the better part of a day. Accuracy was key because I wanted no bleed over or through. I knew I would be putting on multiple coats of the black and the less bleed over, the less touch up when it came to the walnut handrails. Here is an important point about a project like this. It isn’t a weekend one. Before I ever put the first lick of stain on these stairs, I had already invested 3 days (one of rest). I also knew that once I started staining I would have to wait 24 hours between each coat and each spindle was going to get at least 3 coats. I wanted the black to be deep but not totally opaque. I was okay with a bit of grain showing through. Then I would have to wait a few days to allow the spindles to completely cure before taping off to do the handrails. My advice is to plan accordingly and allow the proper amount of time to prep, stain and finish, plus add in at least 15% more. Things just don’t always go as planned!
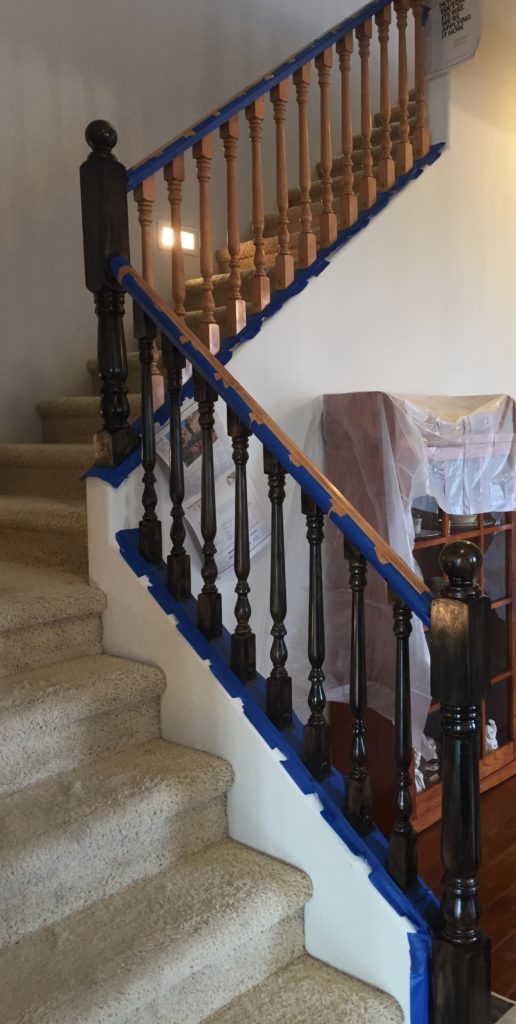
This is the first coat of black gel stain on the lower railing. You can already see an amazing difference. In case you were doubting my “orange” assessment, I bet you have no doubt now. Lookin’ like some Halloween up in here.
As you can see from the photo, the coverage is good but a minimum of three coats is necessary.
This is with two coats
![]()
Looking better, but still needs one more. This is all applied with a sponge brush and be sure to wear gloves. Also, proper ventilation is important.
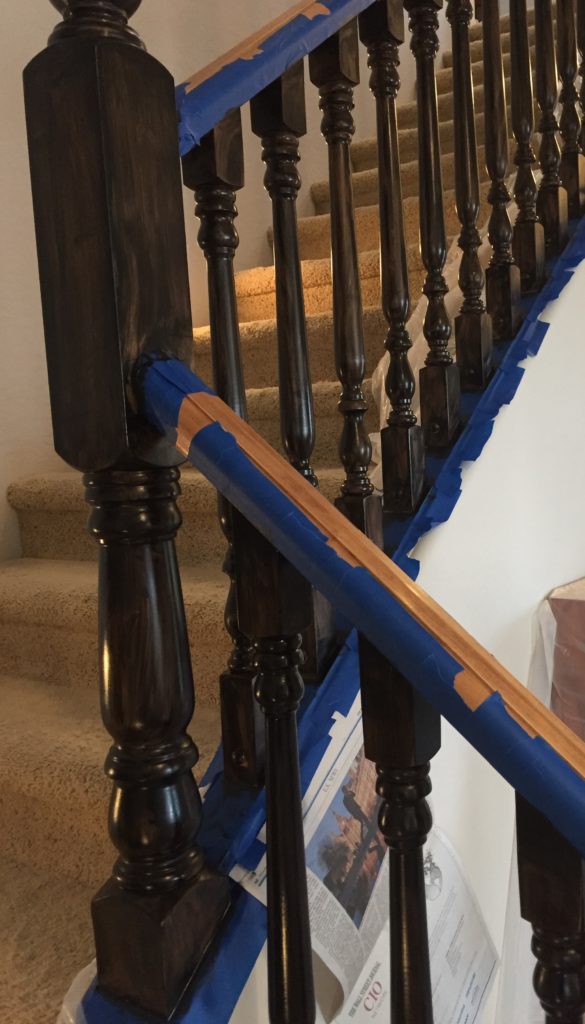
The spindles in the lower part of the photo have two coats and the others have one. You can see the difference in coverage, but the color builds nicely and the gel is great to work with.
I will finish up the details of this project next week, so please come back. I promise that you will not believe how great this turned out and what a difference it made.
