I had a friend inquire, “What do you do all day?”. Sometimes I am not really sure, but it does seem that I am always busy. Other times, I know exactly what I have done and this is one of those times!


I probably spend more time on Pinterest than I should, but I am often inspired by the posted projects and beautiful images. One of the things I learned when we relocated to the Southwest is that homebuilders LOVE medicine cabinets. Every.where. Every.Last.Bathroom. Egad Martha….Just STOP already. As if they aren’t hideous enough, I have two in a Jack and Jill bathroom and in my master bath. I guess they think that you need lots of places to store your drugs. Tee Hee!
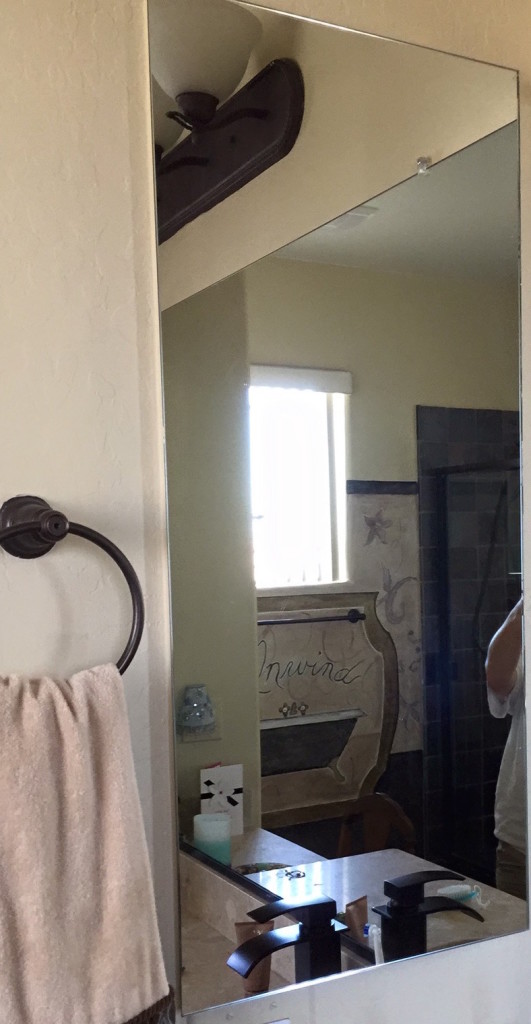
So big, so ugly and in addition to sheet glass mirrors it just gives the entire bathroom a cheap and unwelcoming feel. With a bit of inspiration from a Pinterest post and the Super-Duper handy mister, we decided to tackle the ugly. And we got lots of ugly.
First we removed the medicine cabinet from the wall by loosening the screws and gently cutting away the caulk. Then we filled that big hole with some bead-board in the back, plus a bit of painted poplar to trim out the edges and create shelves.
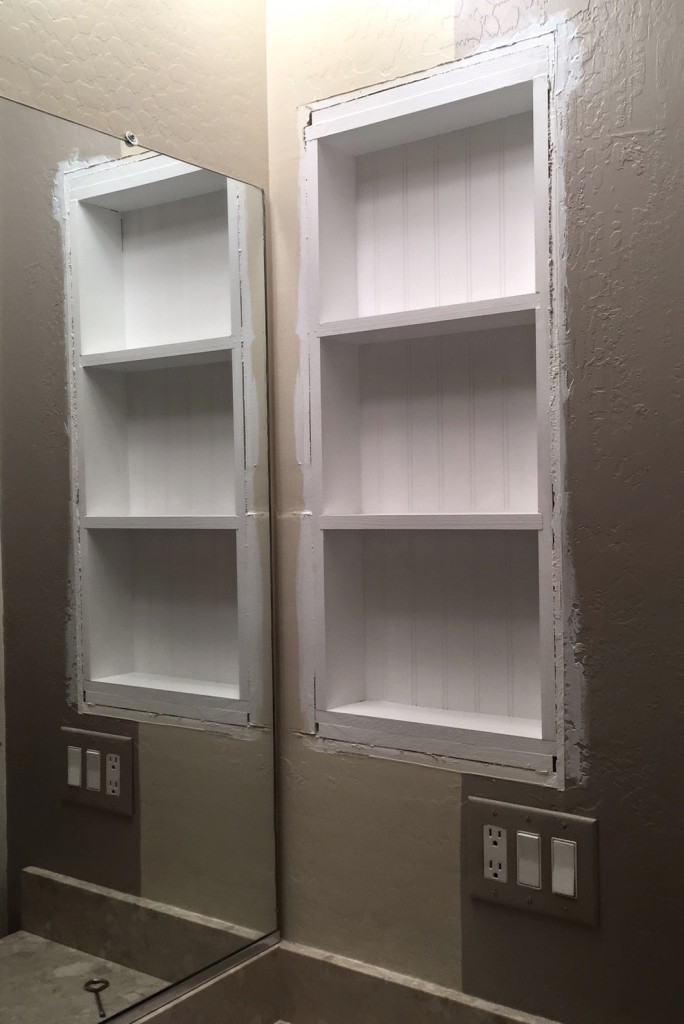
I primed all the new wood and along the edges where the wood meets the wall. Then I applied two coats of white paint.
The mister decided we would frame out the edges of the sheet mirror and the surround of the new shelving unit. I painted these trim pieces with three coats of paint. First a coat of a deep turquoise, then a bit of pale blue and last with a deep charcoal grey. I then distressed (read sanded away some of the grey paint) along all the pieces to give it a more rustic feel. Everything was finished off with 3 coats of spray polyurethane in a flat finish.

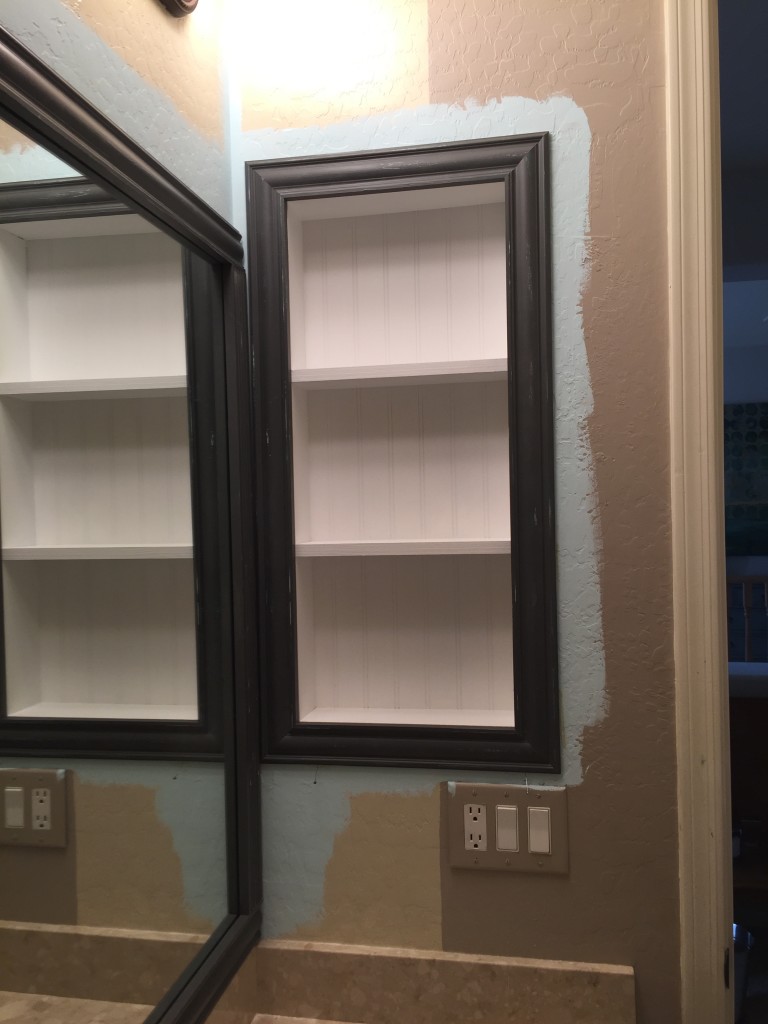
Here you can see the effect that I was after (and achieved!). Because of the close proximity of the sheet mirror to the shelving area, we framed up the mirror first and attached the trim work with construction adhesive. 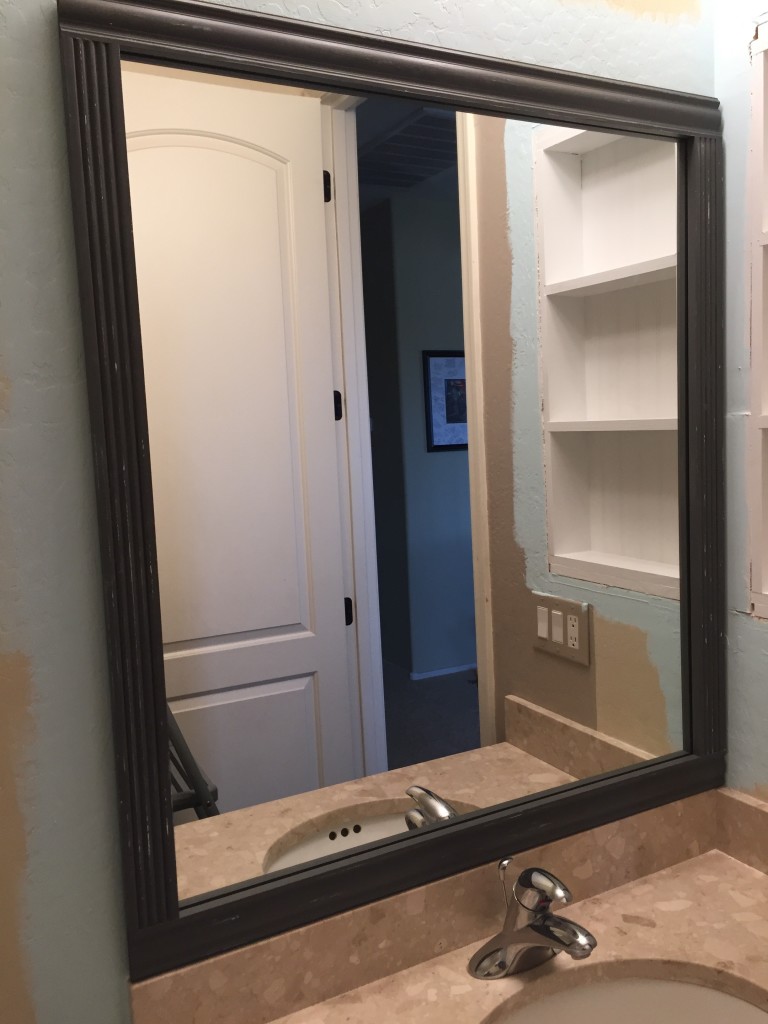
Already a HUGE improvement. This looks custom and not cookie-cutter. Now on to the shelf.
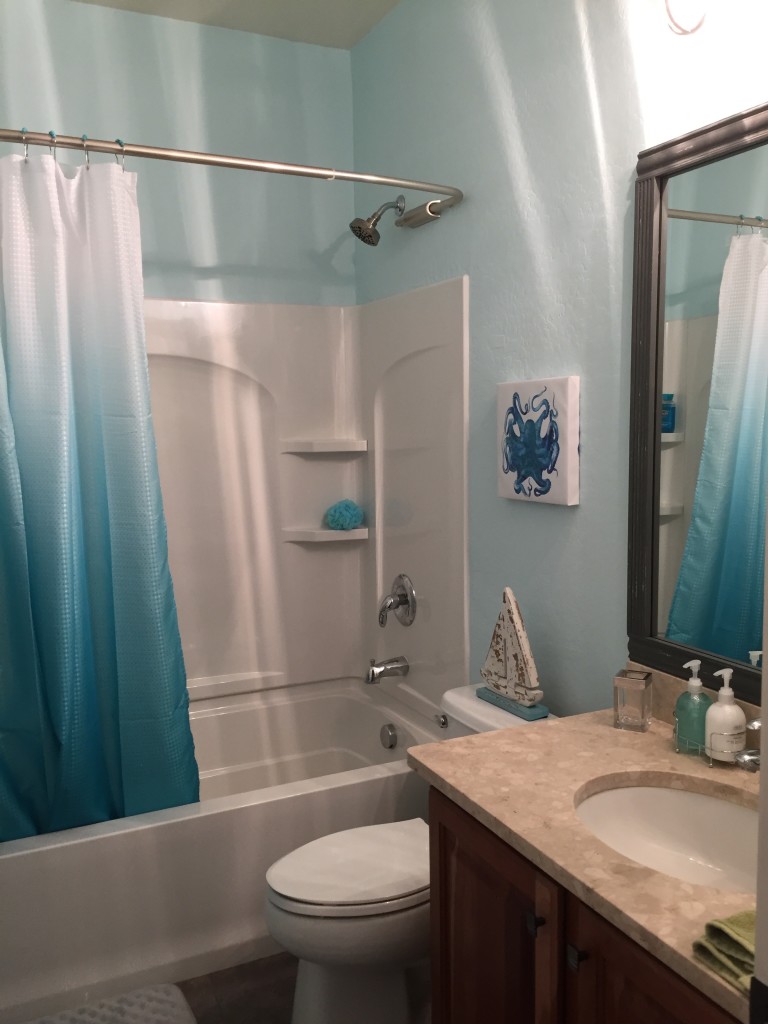
Yep! Good stuff, I tell ya! But it does get better. This is a hall bath and we weren’t looking to make major changes in here just yet. However, we knew that it had to be painted and it seemed like a great time to tackle that silly drug locker. I picked a bright, beachy blue paint for this windowless bath and coupled it with a new brushed nickel light fixture.
Here are a few images of the finished project. I have a (good) feeling that we will be converting a few more of these useless receptacles into something much more aesthetically pleasing.
Looking in
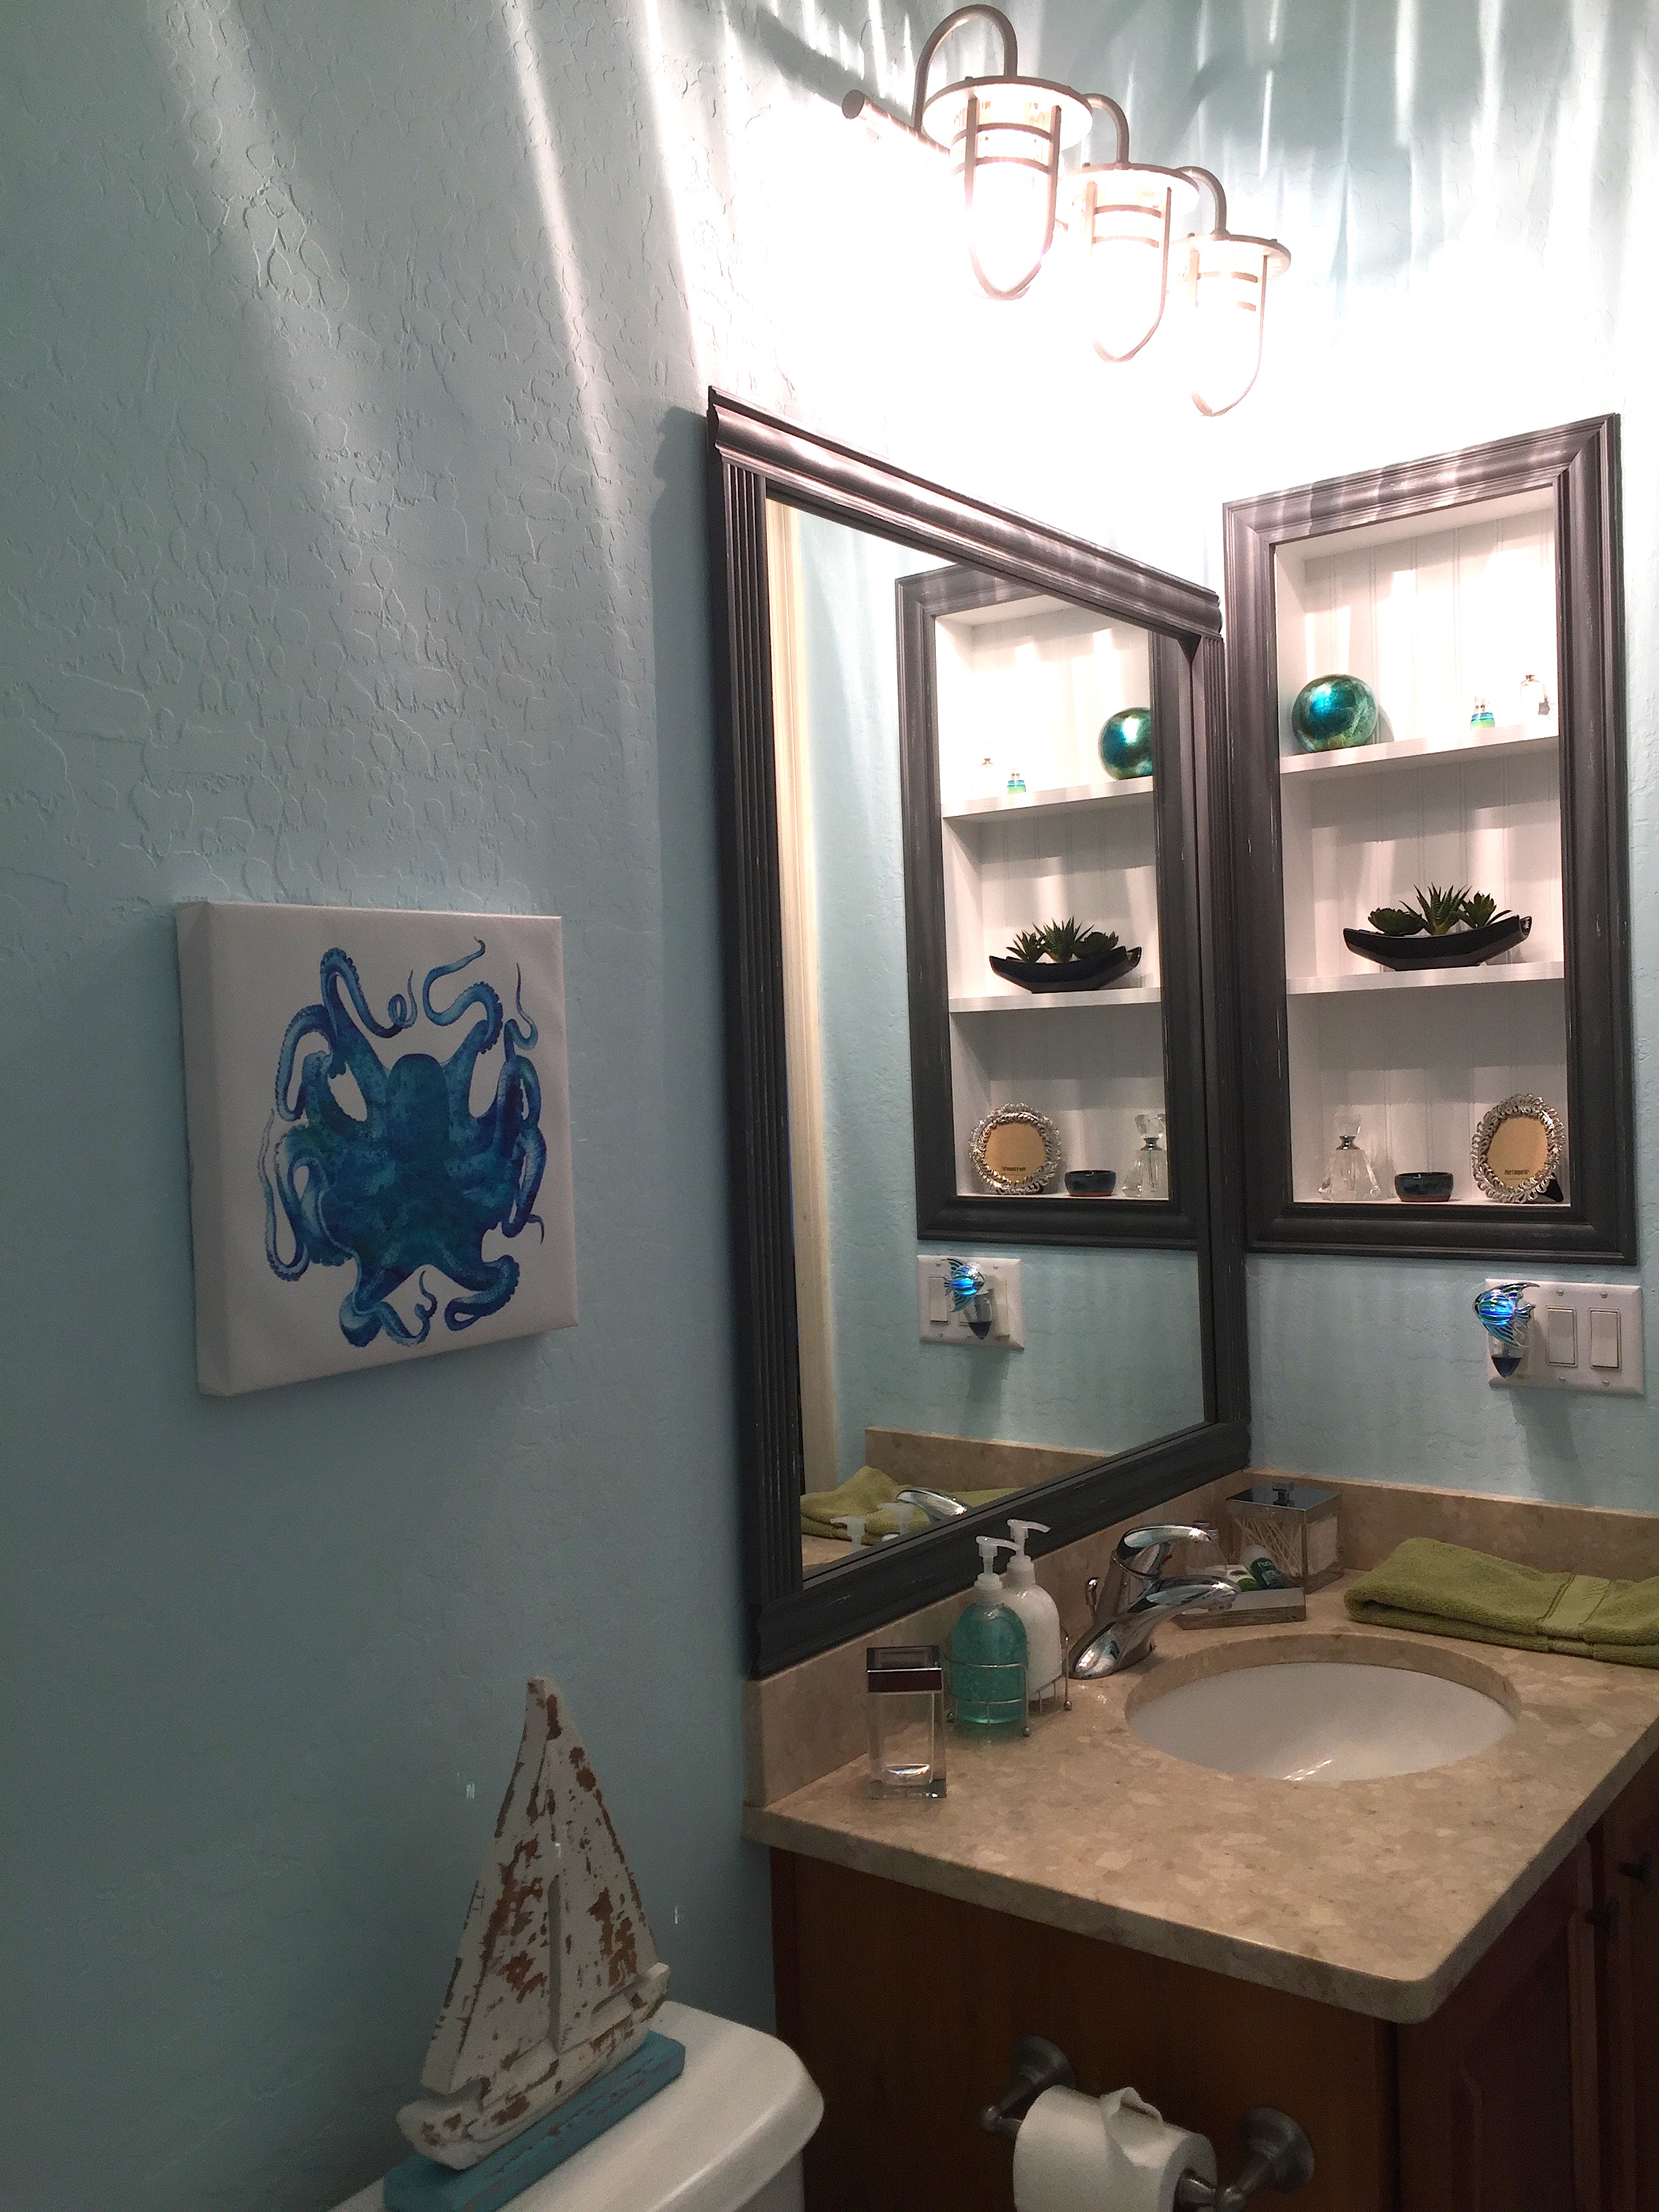
From within the bath. So, so, so much better. For the record, just sheet-rocking over the hole isn’t and wasn’t an option. As you can see in the photo above, the walls and ceilings are textured and it would be nearly impossible to match the texture pattern. When life gives you lemons……….
Lagniappe
The mister is past being ready for pool season and can’t wait for the water to warm up. In that spirit, I helped him do a bit of decorating around the pool area and lounge chairs. He didn’t think it was quite enough, so he cut a surfboard shape out of wood and said “Paint it”. Um, okay.
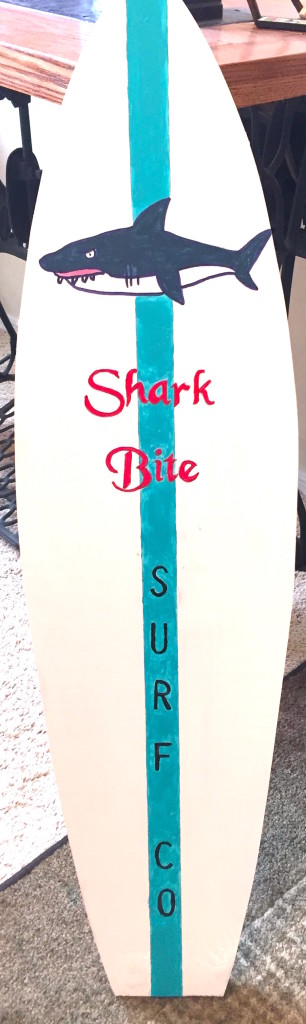
Think this will do?
