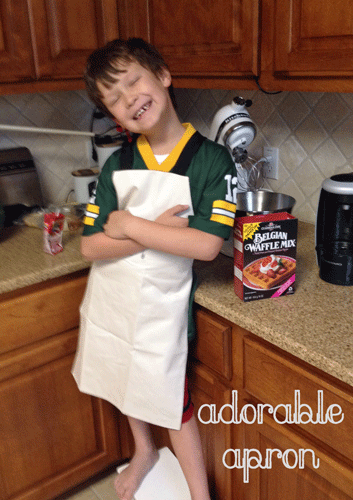
I actually had a quick and crazy get away this past week….it was great, thank you! But before I blew outta town I blew through my sewing room and whipped up a little ditty for a sweet chef-in-training.
Here is how I did it:
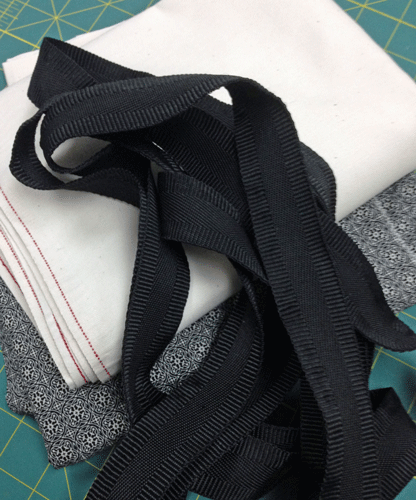
First I chose a lightweight canvas for the front of the apron because I knew I wanted to do some embroidery on the “bib” portion. Then I picked a nice black and cream pattern for the backing and a bit of black canvas tape for the ties and loops. I purchased 1 yard of canvas, 1 yard of backing and 2 1/4 yards of canvas tape. You could use all canvas or all quilting cotton and ribbon, depending on who you are creating this for and the look you are after. Note: I probably needed 3/4 yard of material or less of each fabric but I opted to buy extra.
Since I knew my recipient was tall and thin, I used a simple pattern shape for a straight bib and curved edges under the arms. This apron form is forgiving, so make those simple adjustments now to fit the wearer.
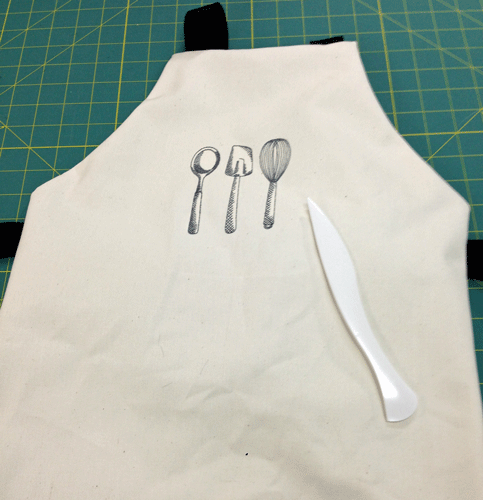
I wanted to add some machine embroidery, so I found the middle of the front canvas piece and stitched out my design from Urban Threads. Love, love, love their designs!
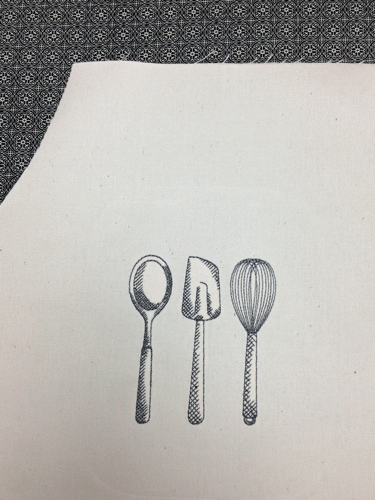
How dang cute is that? Yep, exactly what I was thinking! I kept the design low key and stitched it out with Nearly Black thread from Sulky.
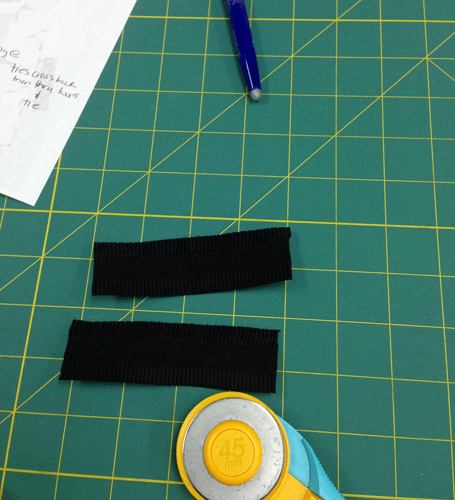
Time to sew this baby together! First I cut two 4″ pieces from my canvas tape and set them aside. These will be your loops. Then I cut the remaining tape in half.
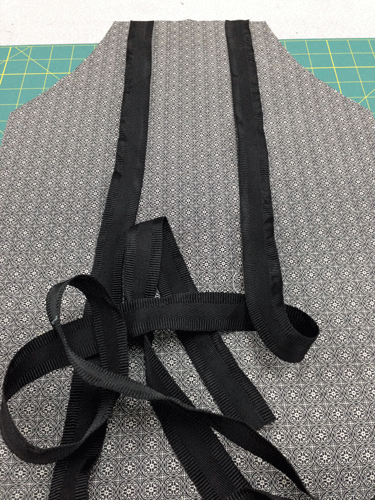
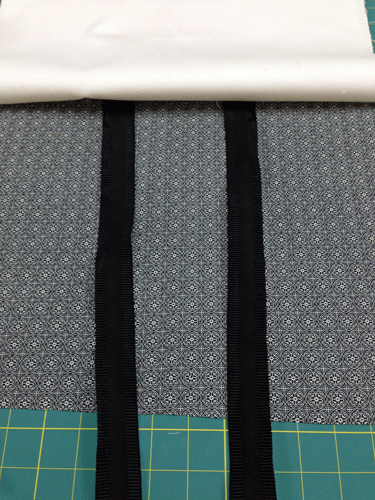
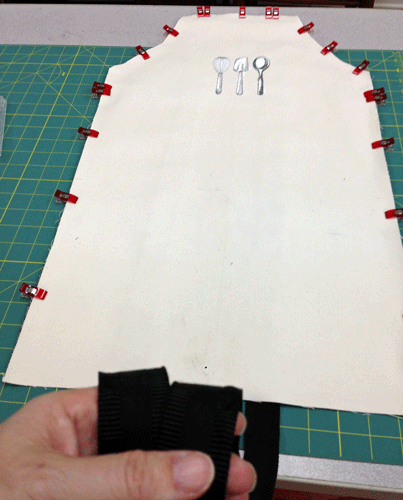
As you can see I placed the backing fabric FACE UP on my table and then determined the placement of the ends of the tie. I simply measured in about 2.5″ from the edge, clipped them on and then auditioned it on me. I adjusted them a bit to where I thought they would be comfortable for my grandson.
Next I layered on the front FACE DOWN and clipped the tie ends into place. 
Now find your two 4″ tape pieces that will make your side loops.
From where the straight side edge begins, I measured down 2″ as my placement point for each loop.
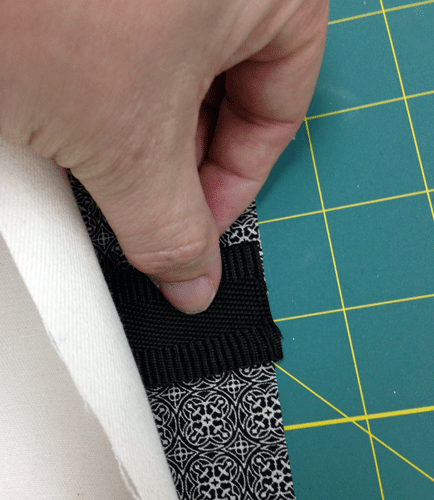
Fold the tape in half and align all of the raw edges. Clip or pin in place.
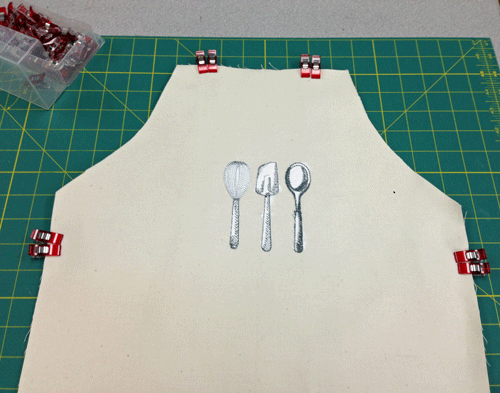
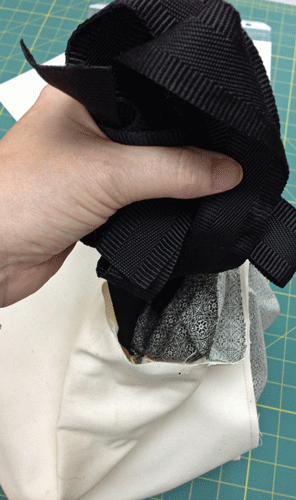
Just to review….Here is the apron, right sides together with the top of the ties and the side loops clipped in place. Make sure that your ties aren’t twisted or otherwise running amok. We are nearly ready to sew up the edges and we don’t want to have to pick out a stray tie!
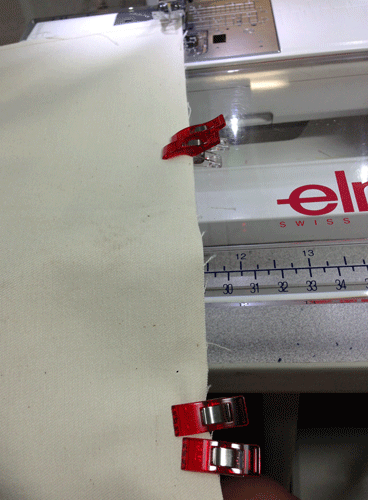
Grab your box of clips or pins and finish securing the edges of your apron in preparation for sewing.
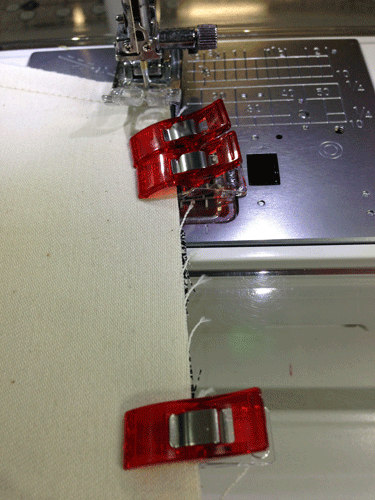
I left about a 5″ opening along the bottom edge for turning and began sewing at one end of this opening using a 1/2″ seam. As I make my way around the apron, I double clipped my loops and the tops of my ties so that I would know exactly where they were as I approached them during sewing. This also ensures that they don’t wiggle about and only half (or less) of the raw edge is caught in the seam. I know, that has never happened to me either! *grin*
As I reached the bottom edge, once again I made sure that I had the ends of those ties under control.
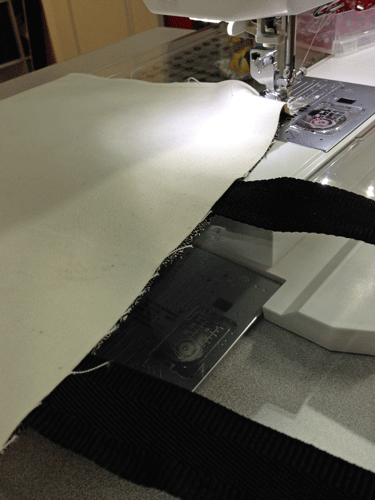
I gently tucked the ends of my canvas tape into the body of the apron so that I wouldn’t have to deal with those ends flapping all around as I finished up the bottom edge.

Then I finished stitching the bottom edge until I reached the clips I put in place to remind me where the opening should be. We do have to turn this thing right side out ya know….
Now reach into the opening and use those ties to help you pull the apron right side out!
Using your favorite tool, push out the corners and points taking care not to puncture the fabric. Give your apron a nice press.
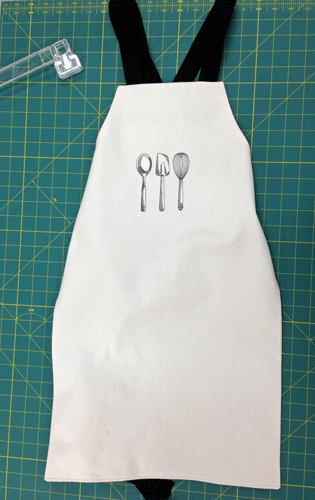
Note that you should have two long ties emerging from the top edge and a small loop on either side of the apron edge.
Align the edges of your opening on the bottom edge and iron. Topstitch along this edge with matching thread to close the opening and finish the seam.
That’s it! You are finished. Easy peasy really….maybe the only crazy thing is how to tie it…..
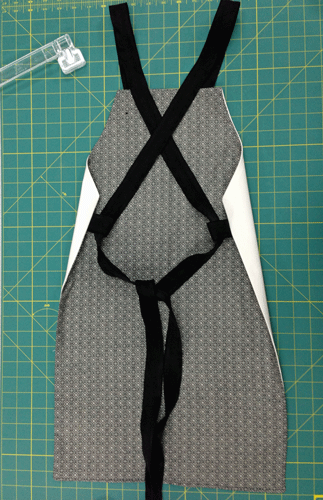
As you can see, one tie goes over each shoulder and then crosses in the center of the back. Feed the tie through the loop on each side and then secure in a bow or a soft knot. This method makes it highly adjustable for the wearer and you need not worry about it being unflattering at the waistline.
This is the quickest and most adorable thing I have made in quite some time! Let me know if you give it a go. I would love to see your version of this nifty project.